
Historique de la page
...
| Sv translation | ||
|---|---|---|
| ||
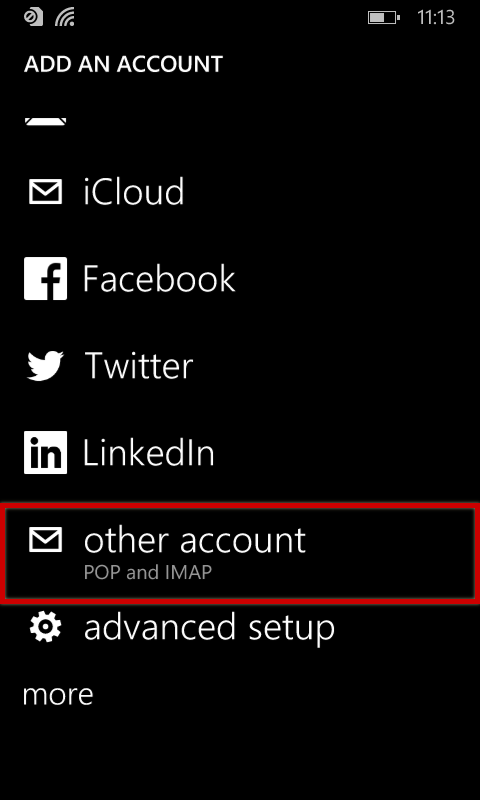
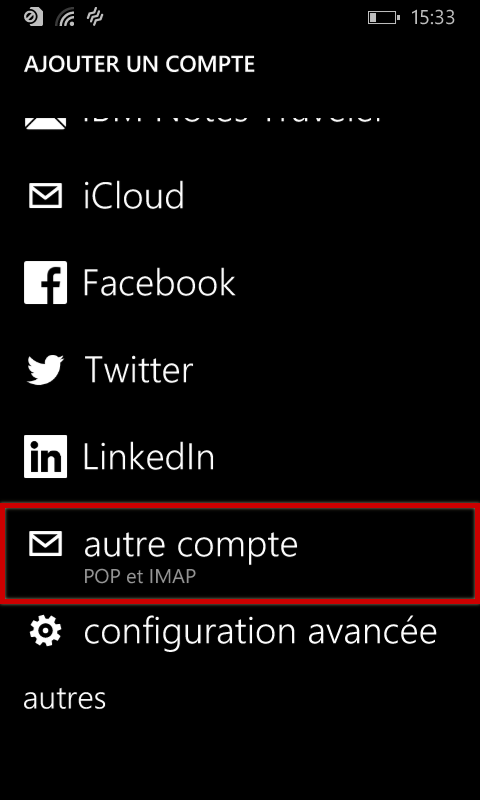
Setting up a new mail accountFrom the home screen or in the list of applications, go to settings: Next choose "e-mail+accounts": Select "add an account": Scroll to and select "other account | Pop and IMAP":
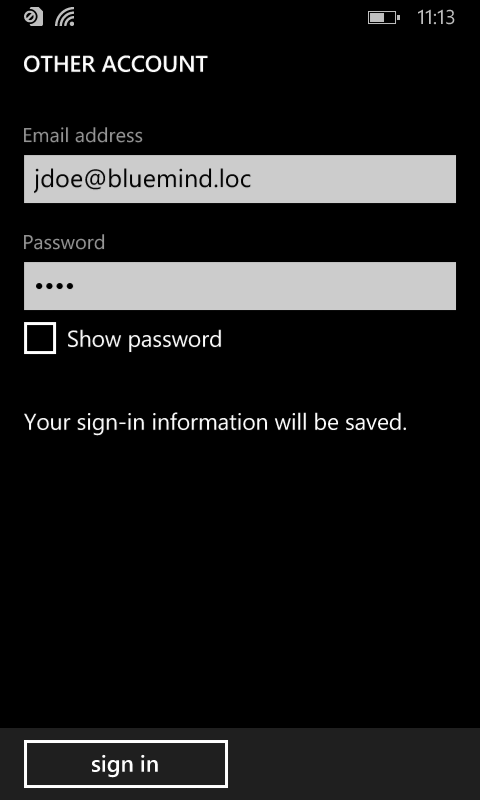
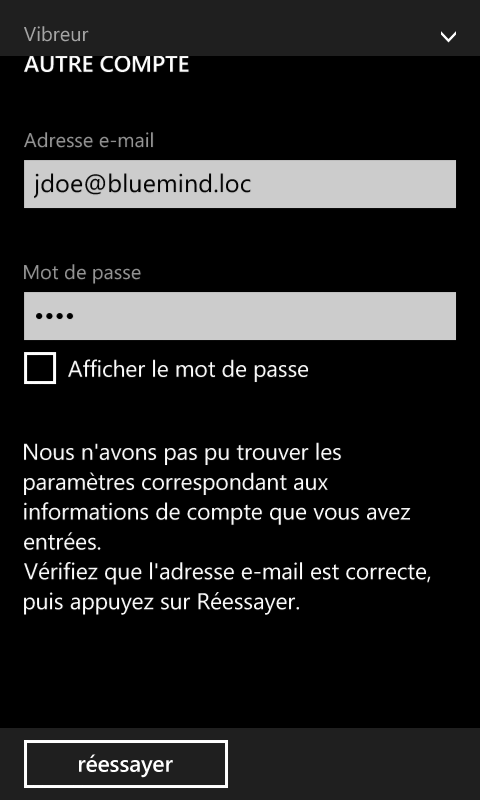
Enter the account's connection information:
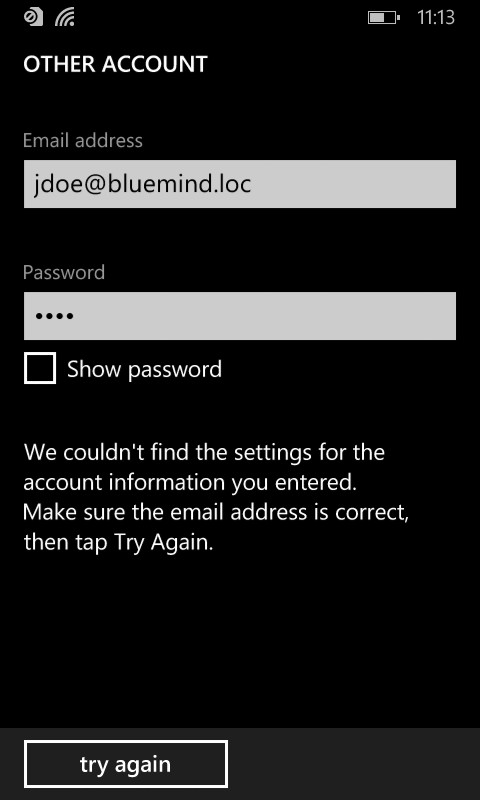
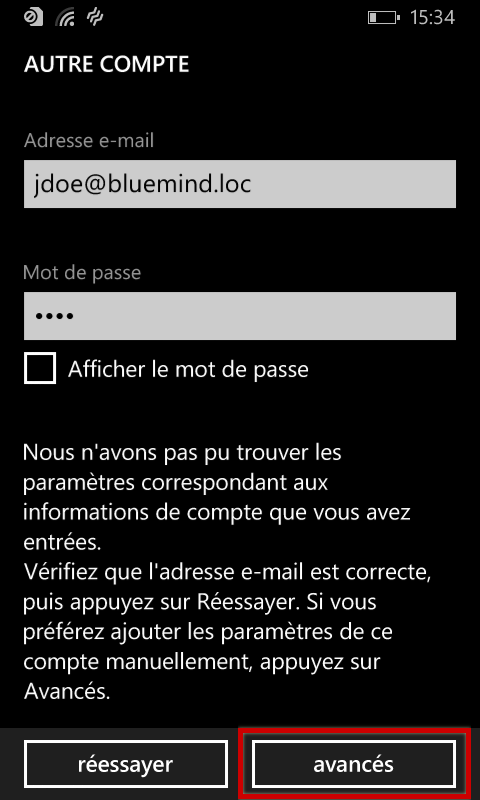
The system warns you it was unable to connect:
Tap "try again". The connection fails again but a new button allowing you to access advanced settings becomes available:
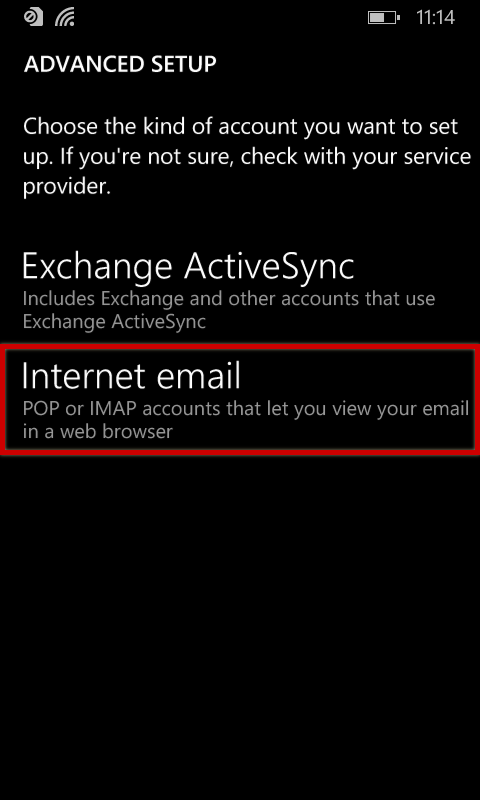
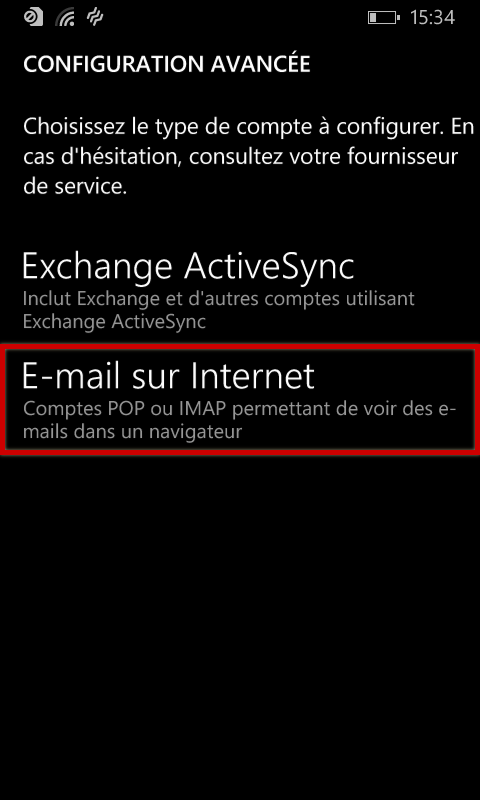
Select "Internet email":
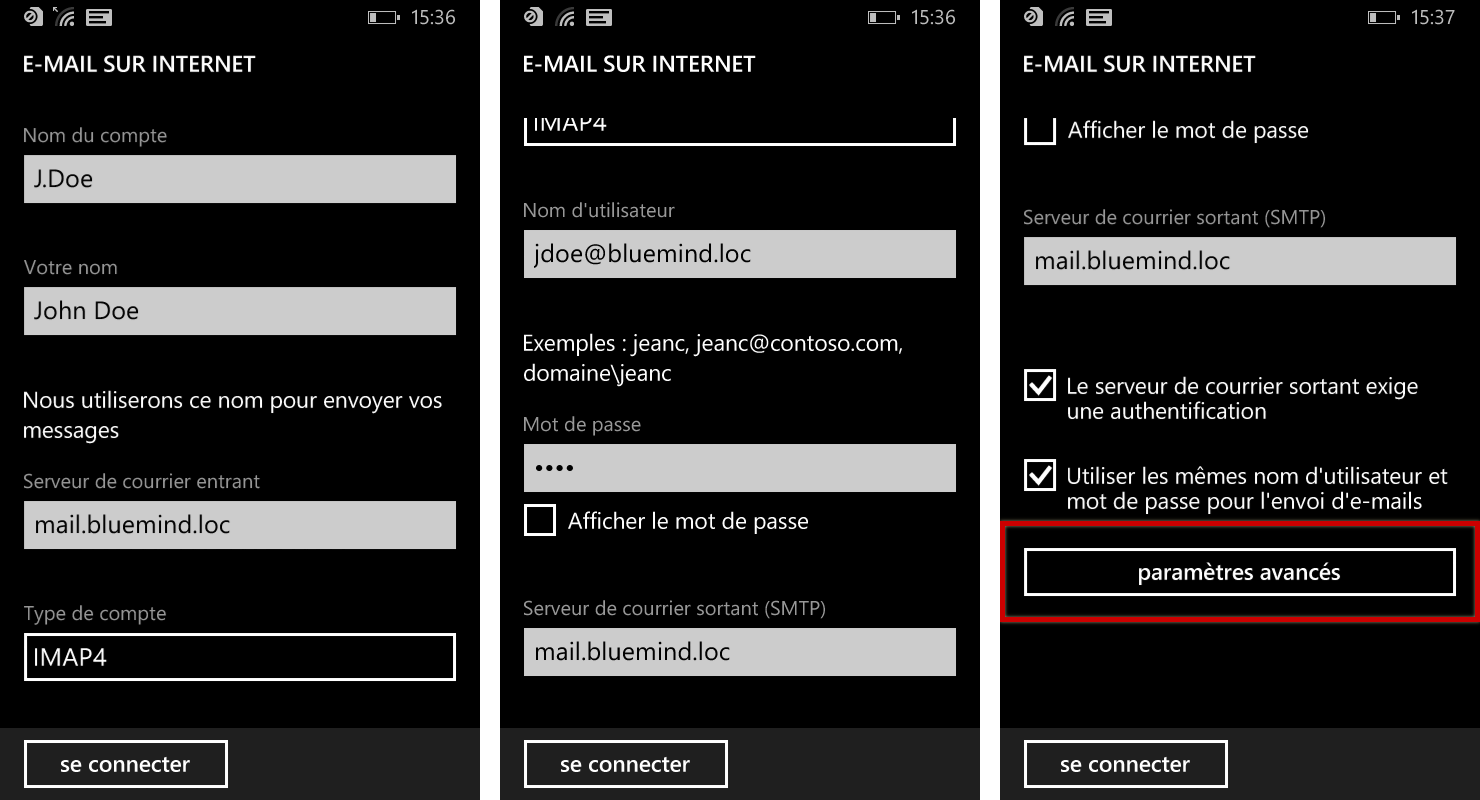
Enter the incoming and outgoing server information:
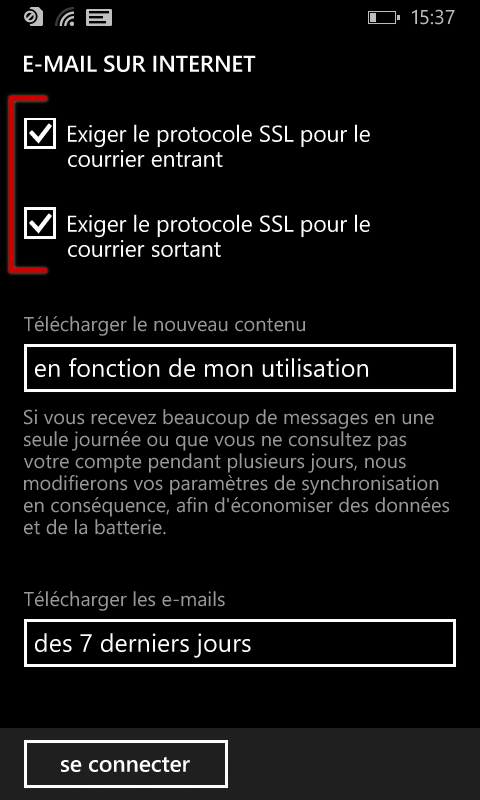
At the bottom of the form, tap "advanced settings" in order to open more configuration options.
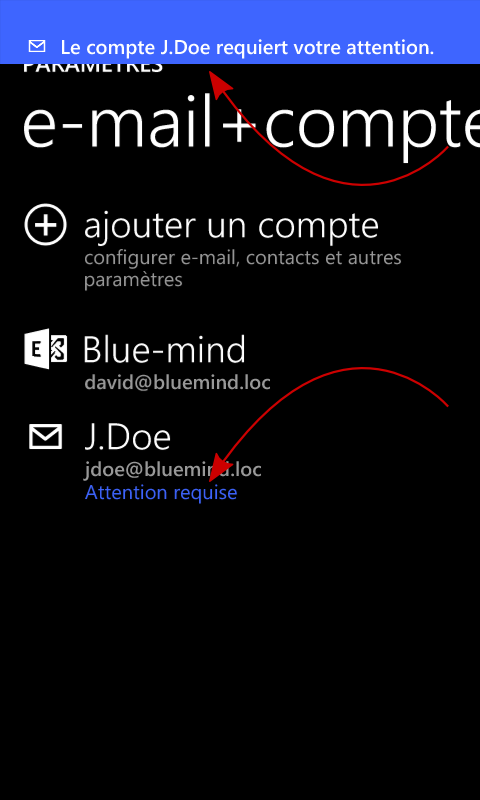
Configuration is almost complete. Back on the accounts page, a double message tells you an action is expected of you:
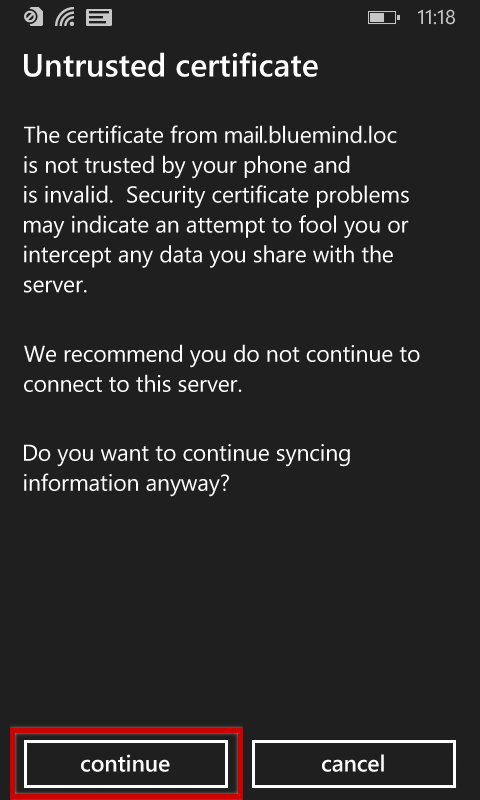
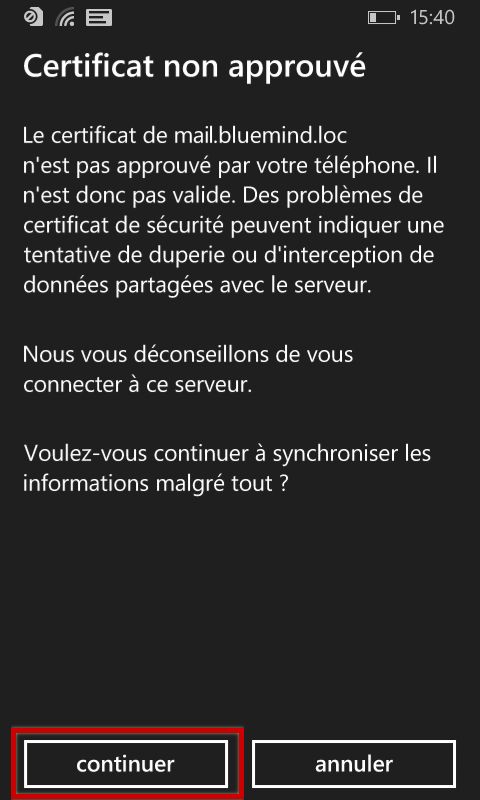
Tap the name of the account. A warning message tells you that you are required to accept the server's certificate. Tap "continue" to confirm:
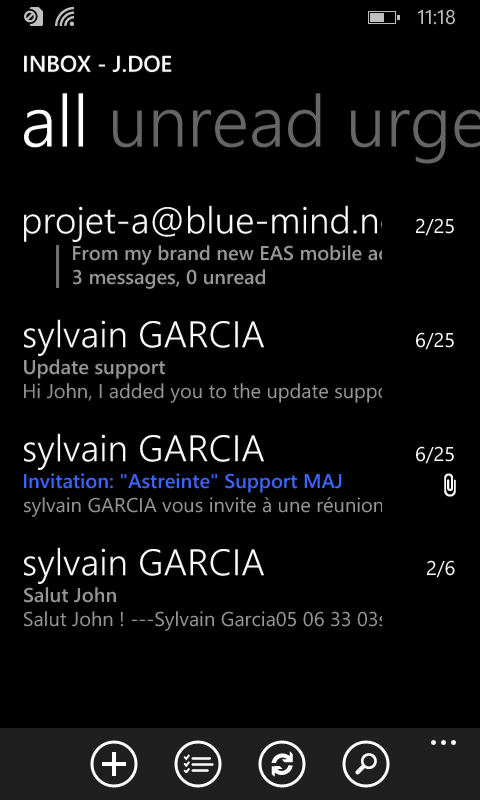
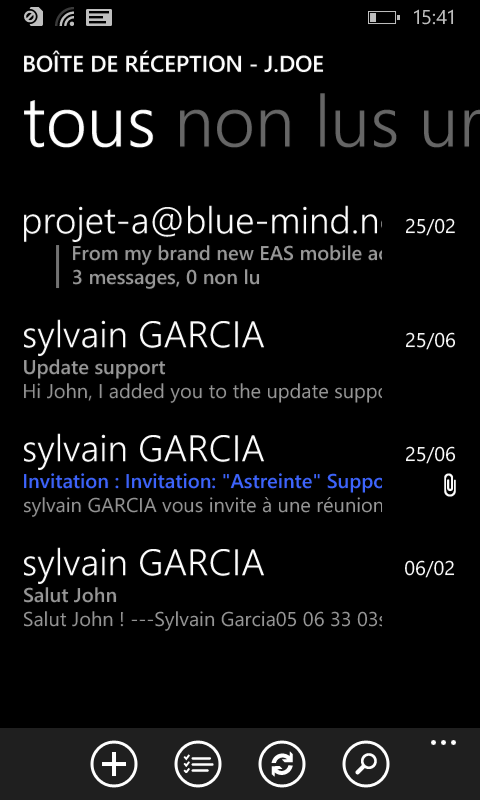
The warning goes away from the accounts screen, messages are retrieved and can be viewed in the application:
|


| Sv translation | ||
|---|---|---|
| ||
Konfiguration des neuen E-Mail-KontosGehen Sie auf dem Startbildschirm oder in der Anwendungsliste zu den Einstellungen: Wählen Sie „E-Mail+Konten“: Wählen Sie „Neues Konto hinzufügen“: Scrollen Sie nach unten, um den Kontotyp „anderes Konto | Pop und IMAP“ auszuwählen:
Das System teilt Ihnen mit, dass es sich nicht anmelden konnte:
Drücken Sie auf „erneut versuchen“, die Verbindung schlägt erneut fehl, aber eine Schaltfläche zum Zugriff auf die erweiterten Einstellungen erscheint:
Wählen Sie die „E-Mail im Internet“-Konfiguration:
Füllen Sie die Verbindungsinformationen für den Eingangs- und Ausgangsserver aus:
Tippen Sie unten im Formular auf „Erweiterte Einstellungen“, um neue Konfigurationsfelder aufzurufen.
Die Konfiguration ist fast abgeschlossen. Zurück auf der Seite der Kontoverwaltung werden Sie durch eine doppelte Meldung darauf hingewiesen, dass eine Aktion erwartet wird:
Tippen Sie auf den Namen des Kontos. Eine Warnmmeldung weist Sie darauf hin, dass das Server-Zertifikat vertrauenswürdig sein muss. Bestätigen Sie mit „Weiter“:
Die Warnung verschwindet vom Kontoverwaltungsbildschirm, die Nachrichten sind nun abrufbar und in der Anwendung verfügbar:
|

Vue d'ensemble
Gestion des contenus
Apps