
Historique de la page
...
| Sv translation | |||||||
|---|---|---|---|---|---|---|---|
| |||||||
Introduction
Message recipients
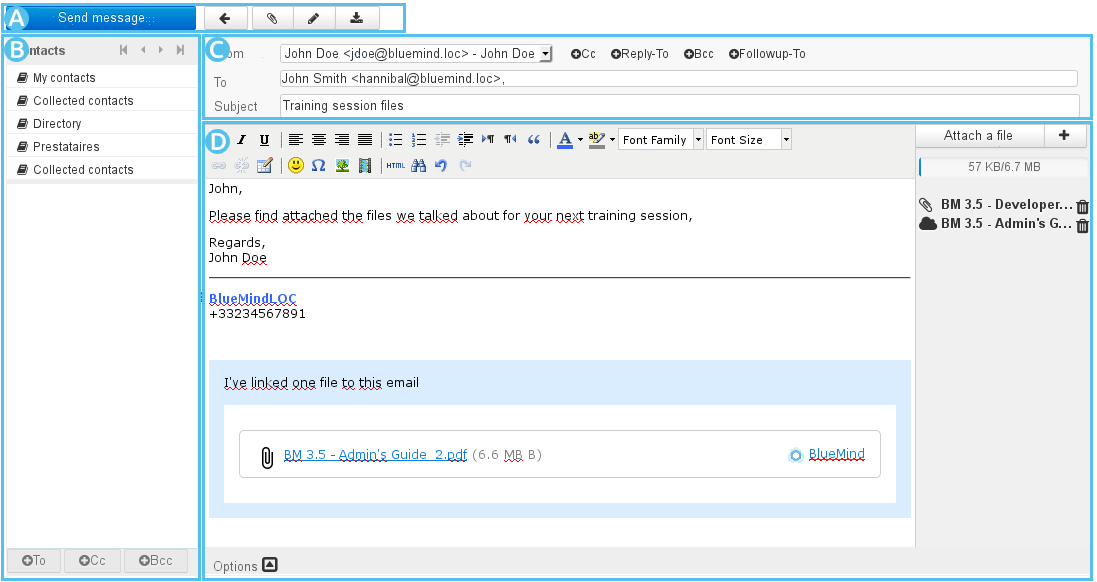
AttachmentsTo add attachments:
To delete an attachment:
OptionsThe
Saving messages
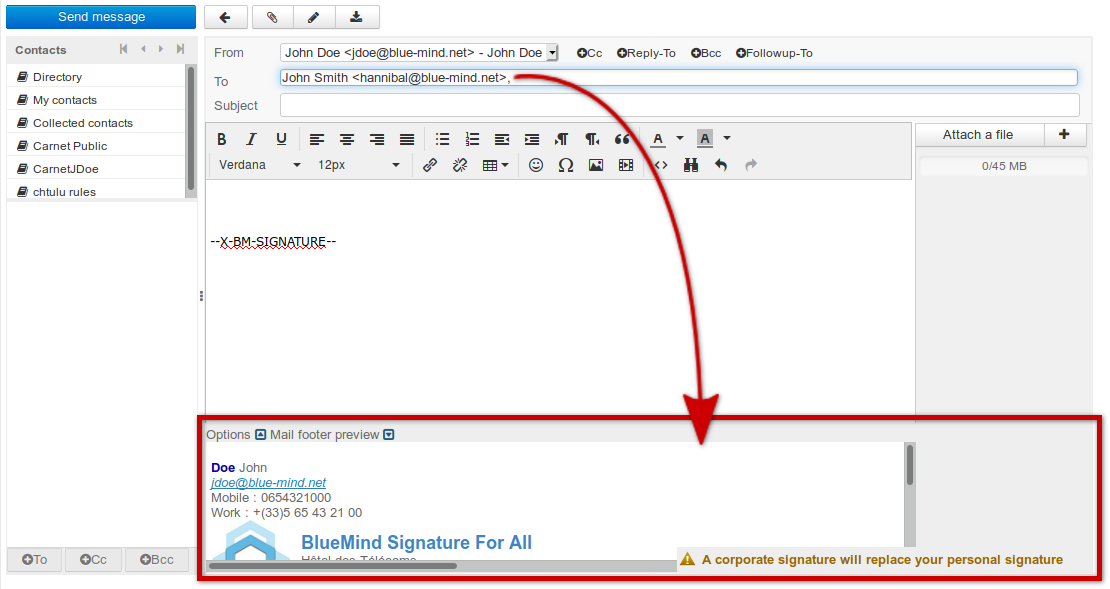
Sending messagesClick Corporate signaturesIntroductionWhen you add recipients in the "To" box, if corporate signatures have been configured and match the message's senders and recipients criteria, a warning message will pop up telling you about the signature that will be added:
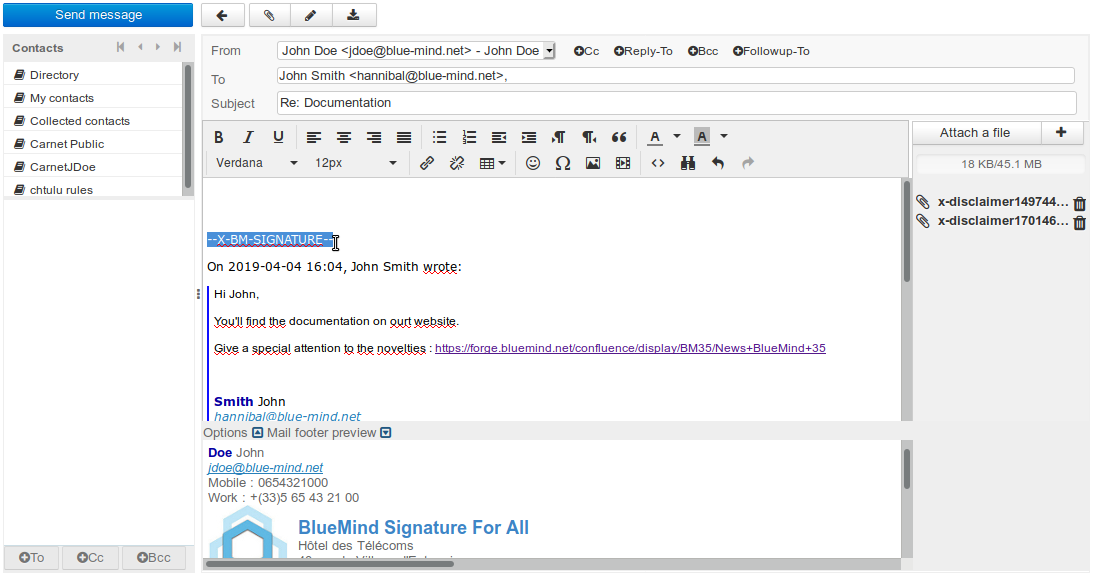
This allows you to control which signature is used in the event that several matching signatures have been configured (if you belong to several groups, for instance, or if a temporary event signature is active). Signature placementBy default, the signature is added at the very end of the message. Some settings allow you to modify this as appropriate. If the signature's manager has enabled the option allowing users to place the signature, the string "--X-BM-SIGNATURE–" is shown where the signature will appear. This is particularly useful when you're replying to a thread of messages:
You can therefore move the signature simply by moving this string with:
|


Vue d'ensemble
Gestion des contenus
Apps