
Historique de la page
...
| Sv translation | ||||||
|---|---|---|---|---|---|---|
| ||||||
Setting up an account
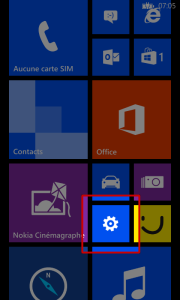
Creating an accountFrom the home screen or the list of applications, go to settings:
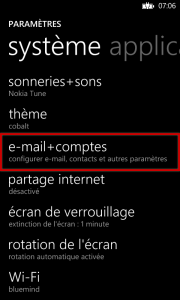
Then select "email+accounts":
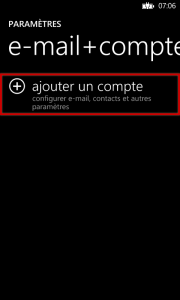
Select "add an account":
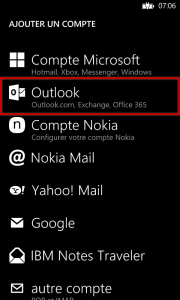
Select an "Outlook" account:
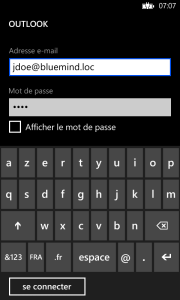
Enter your email address and password and tap "sign in":
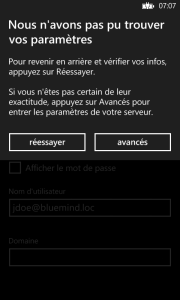
Windows Phone then tests the settings to connect automatically. If it fails to connect, switch to advanced mode:
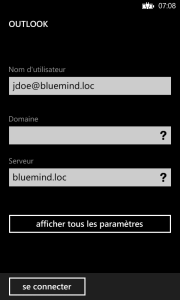
Correct the username and the server:
Barring special cases, the settings are as follows:
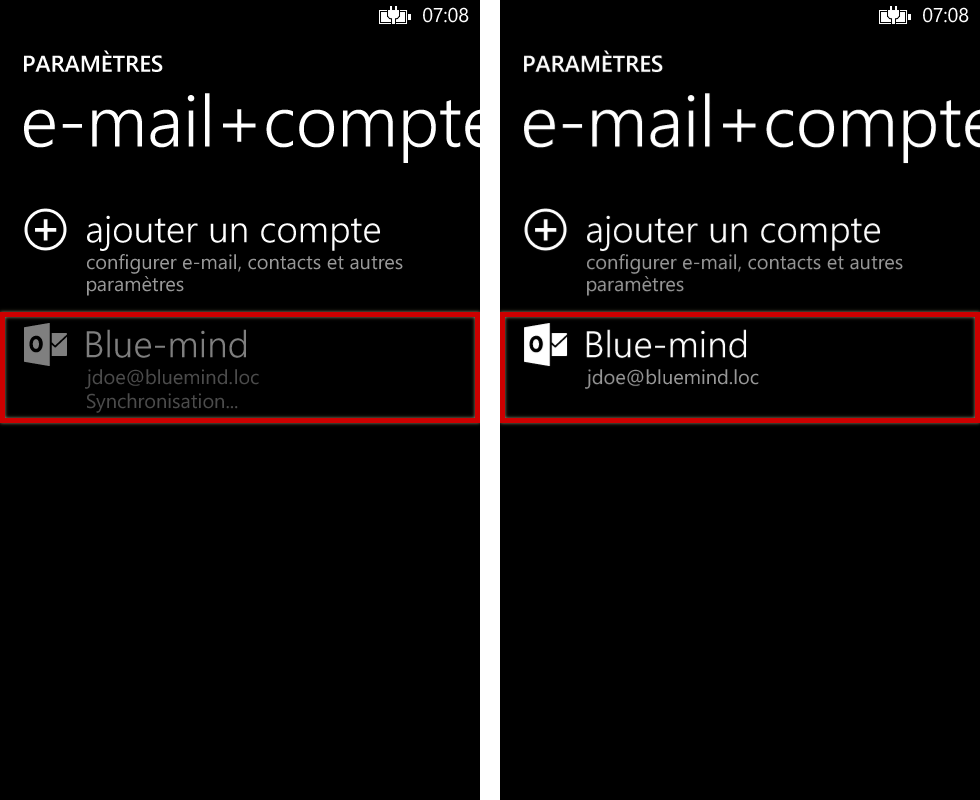
Once this has been corrected, a connection with the server should be established; Windows Phone performs an initial synchronization and the account is shown in settings:
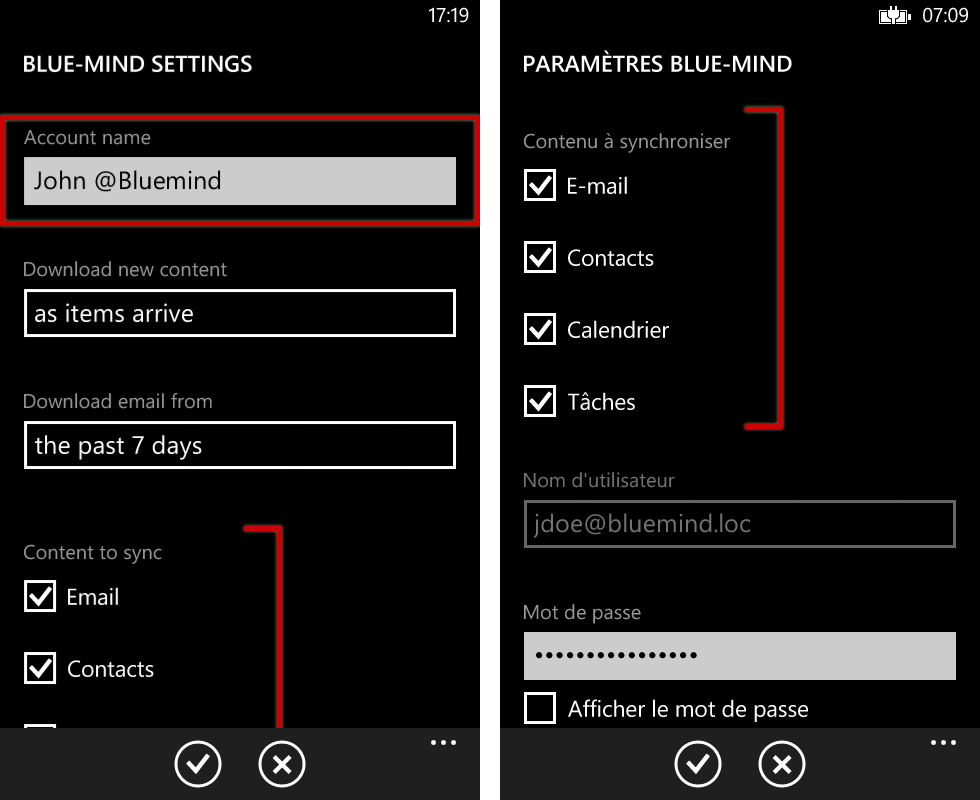
Selecting which items to synchronizeOnce your account is set up correctly, you can customize its name, select which items to synchronize and how often (as items arrive, every 30 mins, 1 hour, etc. or for an extended period e.g. the last 7 days, the last month, etc.):
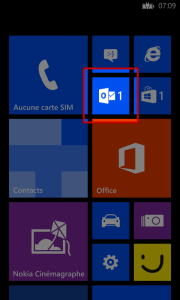
Access to BlueMind Mail is shown on the home screen and shows the number of unread messages if any:
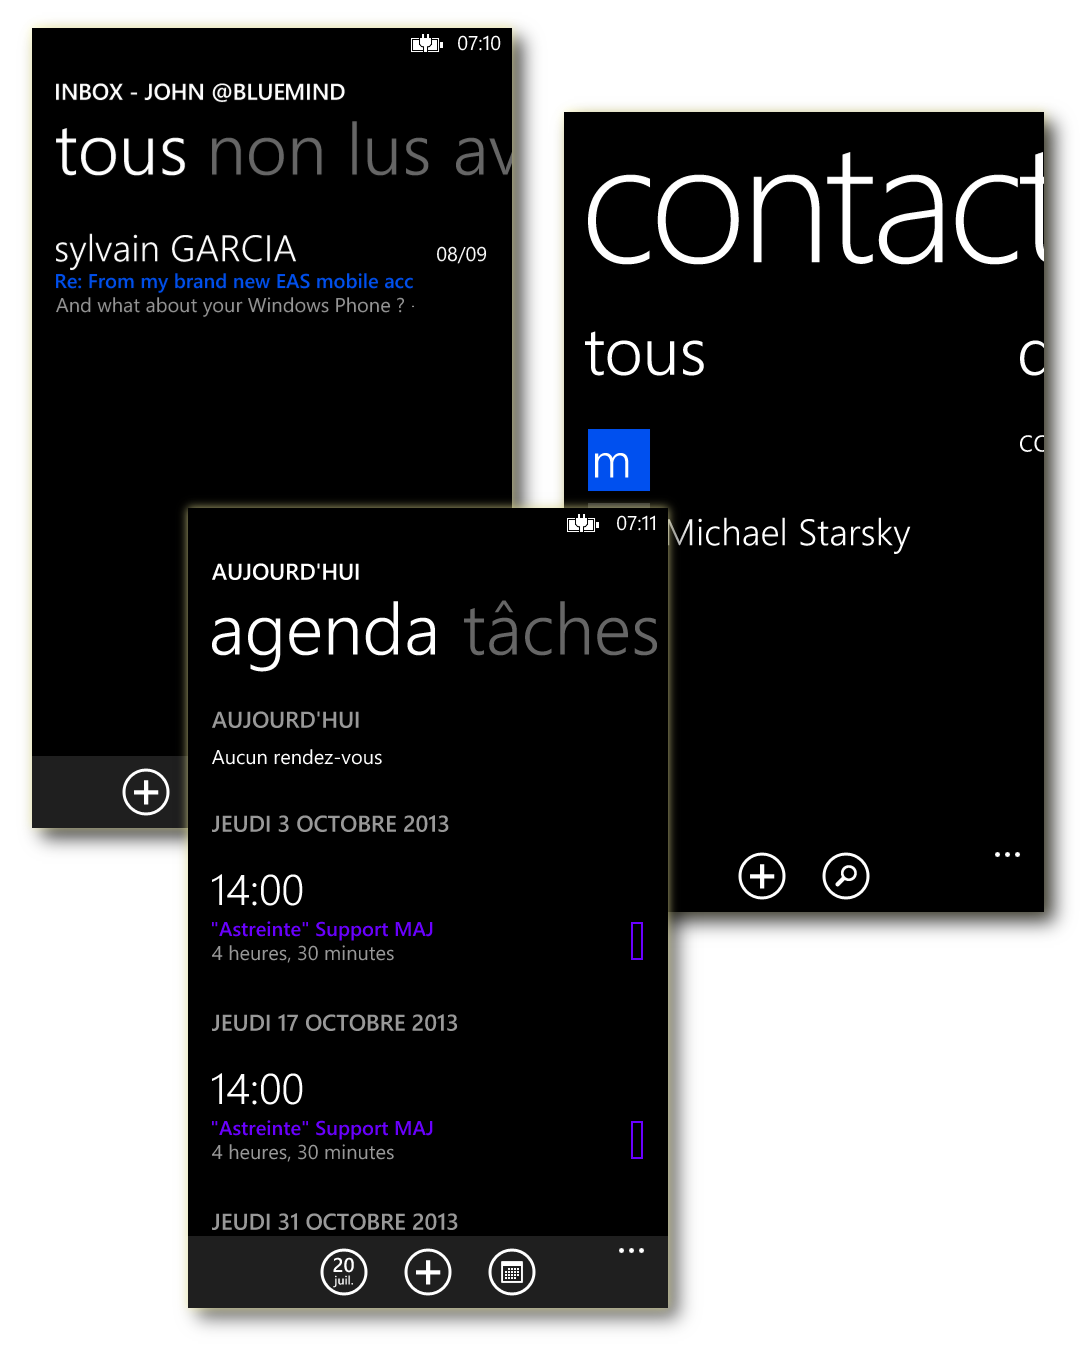
All account data is synchronized and available: messages, contacts, calendar:
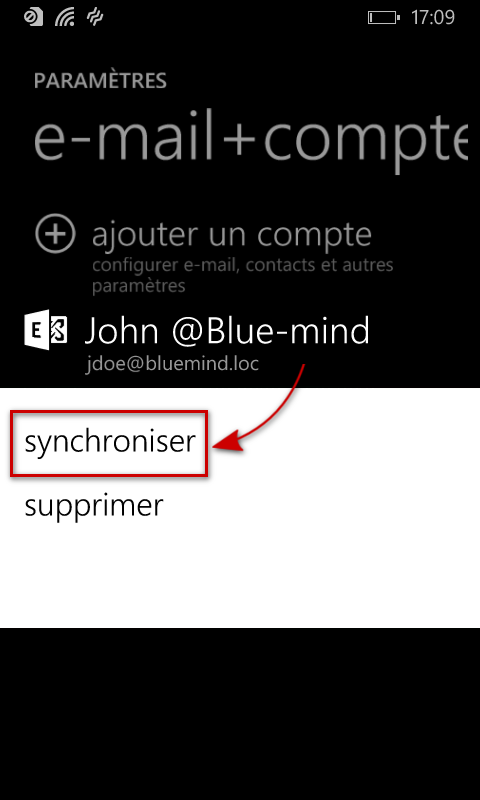
Forcing the calendar to refreshTo force the calendar to synchronize:
|


| Sv translation | ||||||
|---|---|---|---|---|---|---|
| ||||||
Konfiguration des Kontos
KontoerstellungGehen Sie auf dem Startbildschirm oder in der Anwendungsliste zu den Einstellungen:
Wählen Sie „E-Mail+Konten“:
Wählen Sie „Neues Konto hinzufügen“:
Wählen Sie ein „Outlook“-Konto:
Geben Sie Ihre E-Mail-Adresse und Ihr Passwort ein und tippen Sie „Verbinden“:
Windows Phone testet dann die Einstellungen für die automatische Verbindung. Gelingt dies nicht, wechseln Sie in den erweiterten Modus:
Den Benutzernamen und Server korrigieren:
Außer in Sonderfällen:
Dann muss die Verbindung hergestellt werden; Windows Phone führt eine erste Synchronisation durch und das Konto erscheint in den Einstellungen:
Auswahl der zu synchronisierenden ElementeNachdem das Konto korrekt erstellt wurde, können Sie den Namen in den Einstellungen anpassen, die zu synchronisierenden Elemente sowie die Häufigkeit (wann die Elemente ankommen, alle 30 Minuten, jede Stunde usw.) oder den Umfang (die letzten 7 Tage, der letzte Monat usw.) auswählen:
Von da an erscheint der Zugriff auf die Mailbox auf dem Startbildschirm mit einem Hinweis bei ungelesener Mail:
Alle Kontodaten sind synchronisiert und zugänglich: Nachrichten, Kontakte, Kalender:
Erzwingen der Terminkalender-AktualisierungUm die Synchronisation des Terminkalenders zu erzwingen:
|
Vue d'ensemble
Gestion des contenus
Apps