Comparaison des versions

Légende

  • Ces lignes ont été ajoutées. Ce mot a été ajouté.
  • Ces lignes ont été supprimées. Ce mot a été supprimé.
  • La mise en forme a été modifiée.
Commentaire: Published by Scroll Versions from space DA and version BM-3.5
Sv translation
languagefr

Création de la réunion

Créer l'événement

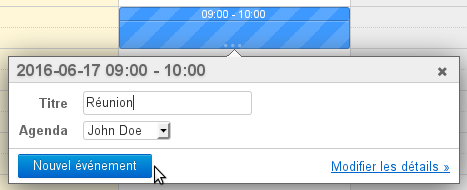
Commencez par créer l'événement dans l'agenda, soit en création complète en cliquant sur "Nouvel événement" soit en création rapide en pré-définissant l'horaire auquel vous souhaitez organiser votre réunion puis en accédant à la création complète grâce au lien "Modifier les détails" :

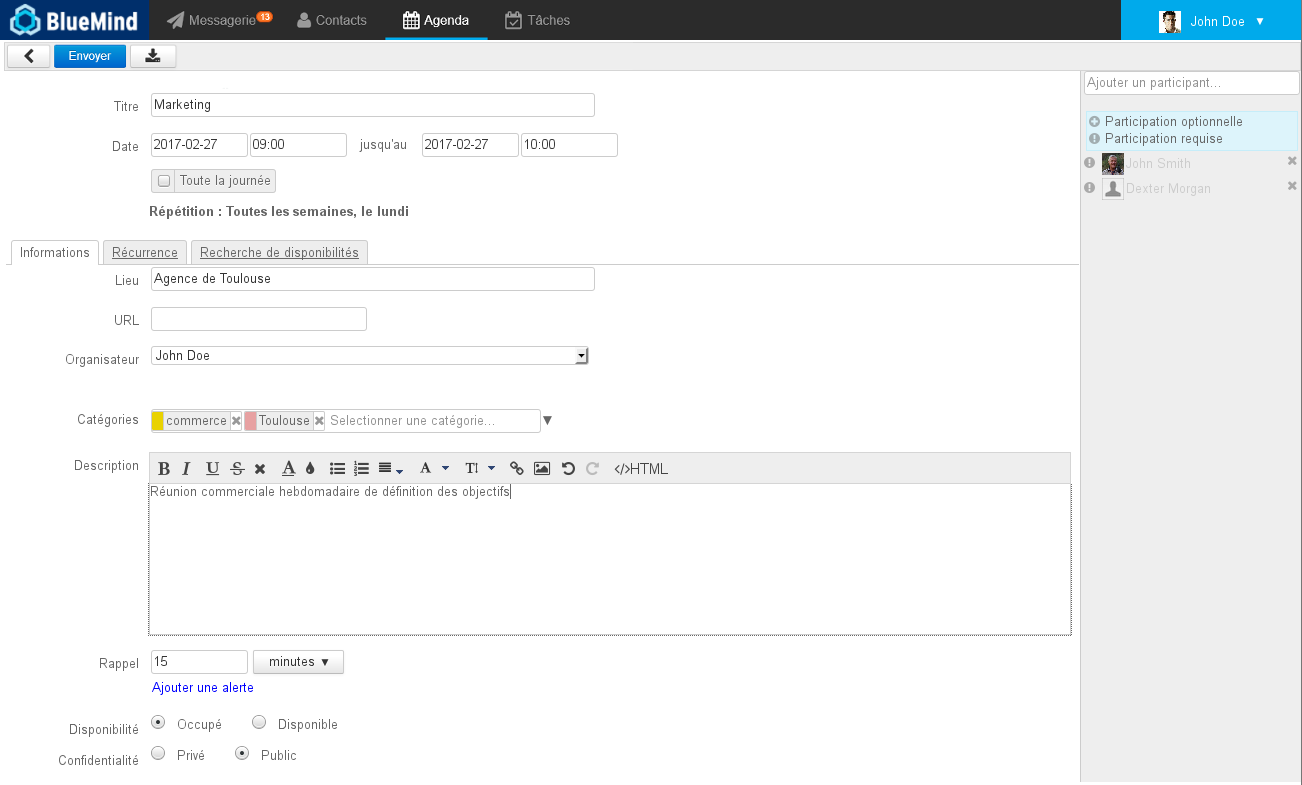
Dans l'écran de création du rendez-vous, renseigner les informations souhaitées : lieu, étiquettes, description, etc.

Volet

Sur cette page :

Sommaire

En rapport :
Les evenements

Définir une récurrence

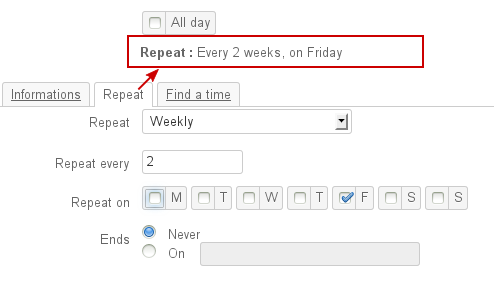
Si vous souhaitez organiser une réunion régulière, rendez-vous dans l'onglet "Récurrence" afin de définir la fréquence de la réunion :

Astuce

La récurrence de la réunion peut être renseignée avant ou après l'ajout des participants et la recherche de créneau, de même qu'elle pourra être ajoutée plus tard en éditant l'événement.

Inviter les participants

Dans la partie droite de la page, ajoutez les utilisateurs ou groupes que vous souhaitez inviter.

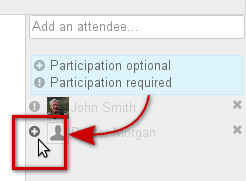
Vous pouvez leur indiquer si leur présence est requise (choix par défaut) ou optionnelle en cliquant sur l'icône devant leur nom après les avoir ajoutés :

Réserver des ressources

Pour réserver une ressource, il suffit de l'inviter à la réunion de la même façon qu'un participant.

Astuce

Pour en savoir plus sur le processus de réservation des ressources, consultez la page Les ressources

Rechercher un créneau disponible

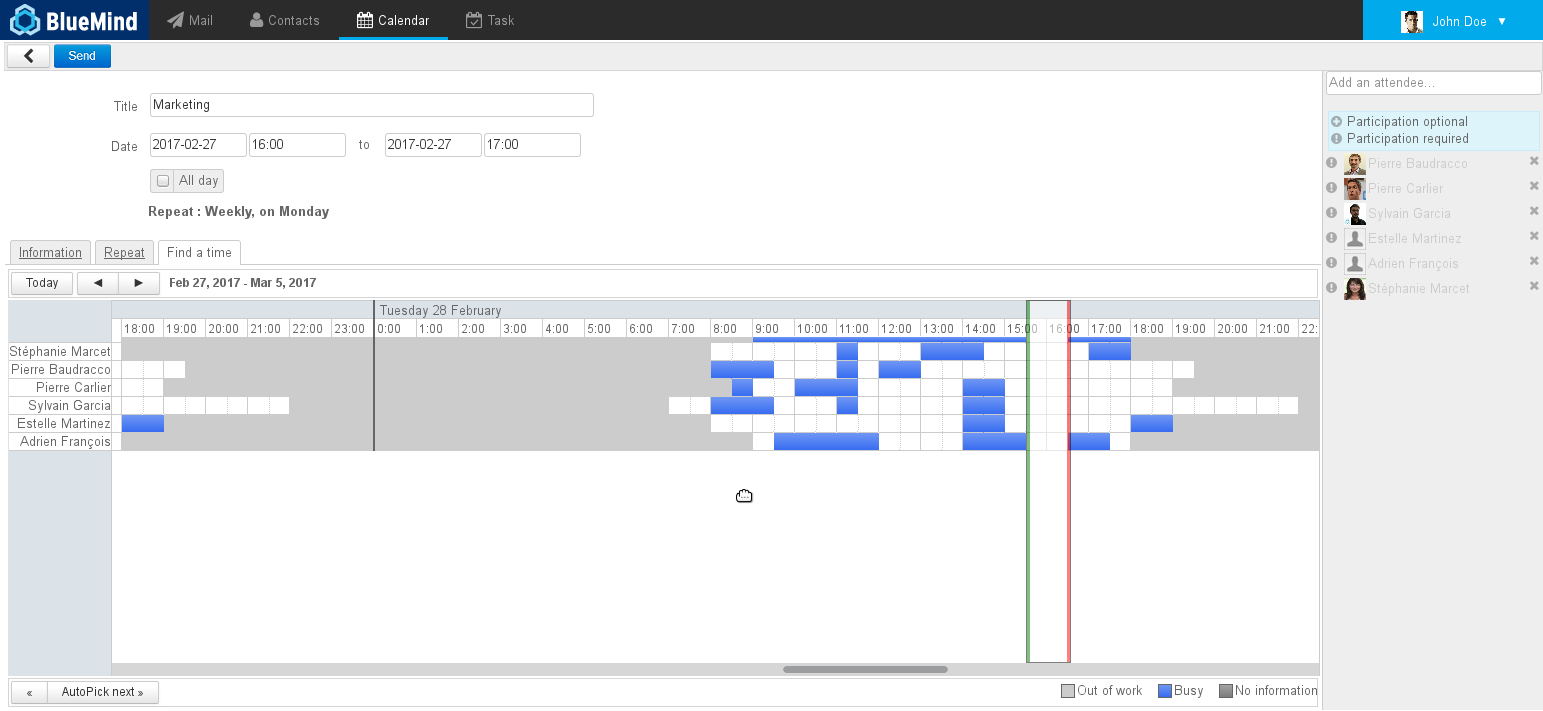
Si un ou plusieurs participants ne sont pas disponible pour le créneau prédéfini, ou si vous souhaitez en chercher un autre, vous pouvez utiliser l'outil de recherche de disponibilités via l'onglet idoine :

Celui-ci vous permet de visualiser les créneaux occupés et disponibles des participants et ressources invités.

  • Faire glisser le bandeau de droite à gauche pour déplacer le créneau
  • Cliquer et glisser les barres verte et rouge pour allonger ou raccourcir la durée
  • Utiliser les boutons de navigation en haut à gauche de l'onglet pour changer de période et l’ascenseur horizontal en bas de l'onglet pour naviguer dans la période

Envoyer l'invitation

Une fois la réunion paramétrée, il suffit de valider pour envoyer l'invitation à chacun des participants ainsi qu'une demande de réservation de ressource.

Pour cela, cliquez sur «Enregistrer» en haut de page. La boite de dialogue suivante apparaît alors :

  • Cliquer sur « Oui » génère l'envoi d'un message (email) à chaque participant et gestionnaire de ressource, l'événement est ajouté dans leur agenda en attente de la validation (ou refus) de leur participation
  • Si vous cliquez sur « Non » alors l'invitation n'est pas transmise par email et n'est pas non plus ajoutée à l'agenda des participants, vous permettant de finaliser éventuellement votre événement en y apportant des modifications avant de lancer les invitations.
Astuce

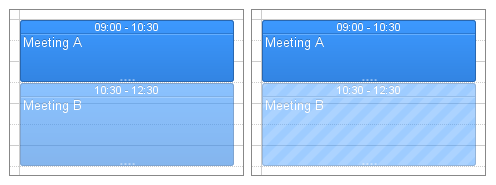
Dans l'agenda de chaque utilisateur ou ressource, un rendez-vous apparaît en couleur pleine si la participation de l'utilisateur est confirmée, en transparence si elle est en attente (ou que l'utilisateur a répondu "peut-être") et en transparence hachurée si l'utilisateur a refusé l'événement :

Gérer les participations

Réception des avis de participation

Lorsqu'un participant valide, refuse, met en attente (réponse «peut-être») l'organisateur de la réunion en est informé par email.

Si un participant modifie sa participation par la suite, le choix lui est laissé de notifier l'organisateur. S'il choisit de ne pas notifier l'organisateur alors c'est sa version seulement de l'événement qui est modifiée, l'organisateur n'est pas tenu au courant et ne voit pas le changement dans sa vision de la réunion.

Consulter le statut de participation

Un participant autre que l'organisateur ne voit pas dans sa version de la réunion les statuts des autres participants. Pour les voir, il doit consulter la version de la réunion de l'organisateur, s'il a les droits de lecture sur l'agenda de celui-ci :

  • les utilisateurs ayant confirmé leur participation apparaissent en noir
  • les utilisateurs en attente (ou ayant répondu "peut-être") sont grisés
  • les utilisateurs ayant refusé l'événement apparaissent grisés et barrés
Info

  • Les participants ne voient plus le détail des participations des autres participants, seul l'organisateur est tenu au courant.
  • Une nouveauté de BlueMind 3.5 particulièrement attendue est la possibilité d'indiquer une participation différente suivant les occurrences d'une réunion récurrente. Ainsi les participants peuvent accepter toute la série d'une réunion et, au besoin, indiquer qu'il ne participeront pas à l'une ou l'autre de ses occurrences.
  • Chaque participant a désormais sa propre vue d'une réunion, ce qui lui permet de la modifier (personnalisation du titre, ajout d'une description, détail du lieu, etc.) sans que les modifications soient visibles des autres participants.

Inviter/retirer des participants

Pour inviter de nouveaux participants ou exclure des personnes déjà invitées, il suffit d'éditer l'événement :

  • dans l'agenda, cliquer sur l'événement pour faire apparaître la fenêtre d'information
  • cliquer sur le lien "Modifier les détails"
  • ajouter et retirer des participants dans la partie droite de la fenêtre
  • cliquer sur «Enregistrer» pour valider les modifications et envoyer les nouvelles invitations.

Enregistrer

Enregistrer

Enregistrer

Enregistrer

Enregistrer

Enregistrer

Enregistrer

Enregistrer

Enregistrer

Sv translation
languageen

Creating a meeting

Creating an event

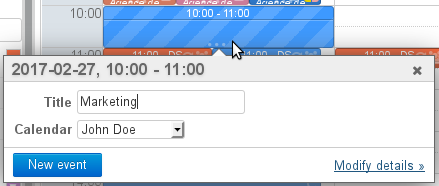
First create an event in the calendar, either the regular way, by clicking "New event", or using the quick-create feature, by selecting the event's duration in the calendar and then accessing the event details by clicking "Modify details":

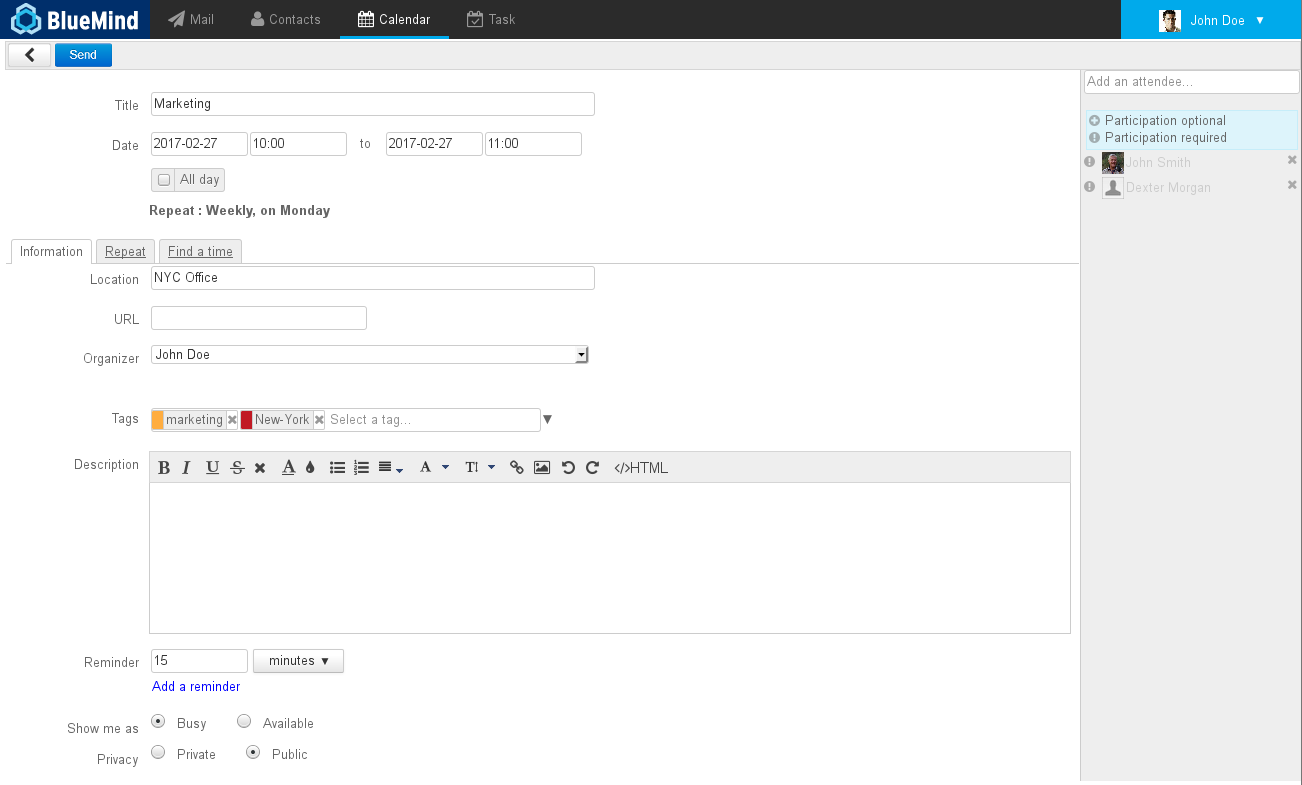
In the event creation window, fill in the relevant information: location, tags, description, etc.

Volet
borderWidth3

On this page:

Sommaire
maxLevel2

Related:
Les evenements

Scheduling a recurrence

If you'd like to organize a recurring meeting, go to the "Repeat" tab to set the meeting's periodicity:

Astuce

A meeting's periodicity can be set before or after adding participants and time-slot search. It can also be added later by editing the event.

Inviting participants

In the right-hand side of the page, add the users or groups you want to invite.

You can choose for their participation to be required (default) or optional, by clicking the icon shown before their name after they are added:

Booking resources

To book a resource, simply add it to the meeting as you would another participant.

Astuce

To find out more about booking resources, please go to the page Resources.

Searching for an available time slot

If one or several participants are not available during the selected time slot, or if you want to look for another one, you can use the availability search tool in the "Find a time" tab:

This tab allows you to view busy or available time slots for the participants and resources invited. 

  • Drag the strip from left to right to move the time slot
  • Click and drag the green and red lines to increase or decrease the meeting's duration
  • Use the navigation buttons in the top left corner of the tab to change time periods and the horizontal scroll bar at the bottom of the tab to navigate within the period

Sending invitations

Once the meeting's parameters are set, simply validate to send an invitation to each participant as well as a resource booking request.

To do this, click "Save" at the top of the page and the following dialog box opens:

  • Clicking "Yes" generates an email message which is sent to each participant and the resource's manager. The event is also shown in their calendar until they accept or reject the invitation
  • If you click "No", no invitation will be sent by e-mail nor will anything be added to other participants' calendars, which allows you to edit and finalize your event before you send invitations.
Astuce

In each user's or resource's calendar, solid colors indicate participation is confirmed, transparent colors indicate participation is pending confirmation (either a reply is pending or the user has replied "maybe") and in a striped transparent color if the user has declined the invitation:

Managing participation

Participation notices

When a participant accepts, declines or puts on hold an invitation (replies "maybe"), the meeting's organizer is informed by email.

If a participant later modifies their attendance status, they can choose whether or not to notify the meeting organizer. If they choose not to notify the organizer, then only their own version of the event is modified, the organizer's version is not updated and it will not show any changes.

Viewing participation statuses

Participants other than the organizer cannot see other participants' attendance statuses in their version of the event. To see them, they must consult the organizer's version – provided they have reading privileges over that calendar:

  • users who have confirmed participation are shown in black
  • users whose response is pending (or replied "maybe") are grayed out
  • users who have declined the invitation are shown grayed and struck out
Info

  • Participants can no longer see the details of other participants' assistance, only the organizer is kept informed.
  • A long-awaited BlueMind 3.5 feature is being able to specify different participation statuses for each instance of a recurring meeting. As a result, participants can confirm their assistance for a whole series and, if necessary, specify that they will not attend a specific instance.
  • Each participant now has a customized view of a meeting, which means they can edit it (customized title, description, location, etc.) without it being visible by other participants.

Inviting/removing participants

To invite new participants or to exclude invitees, simply edit the event:

  • in the calendar, click the event to open the information window
  • click the link "Modify details"
  • add and remove participants in the right hand side of the window
  • click "Save" to validate changes and send new invitations.

Enregistrer

Enregistrer

Enregistrer

Enregistrer

Enregistrer

Enregistrer

Enregistrer

Enregistrer

Enregistrer