Installation et configuration
Afin d'installer le connecteur, les paquets nécessaires doivent avoir été préalablement installés par l'administrateur sur le serveur BlueMind. Si le connecteur n'est pas visible dans la section de téléchargement, veuillez vous tourner vers votre administrateur.
Pour en savoir plus sur la procédure d'installation côté serveur, veuillez consulter le Guide de l'Administrateur > Mise à disposition du connecteur Outlook
Installation
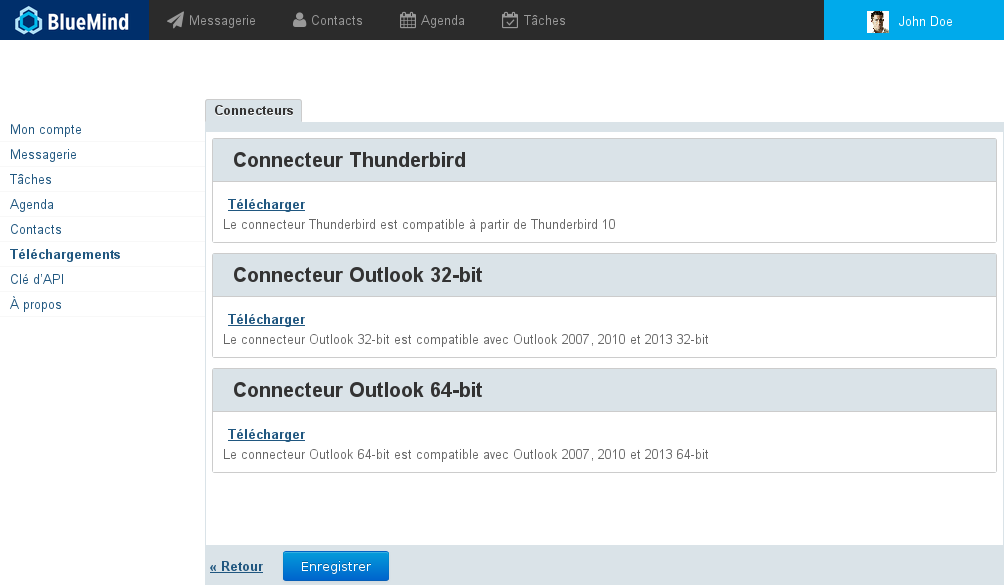
Quelle version télécharger ?
La version du connecteur doit correspondre à la version d'Outlook installée, qui n'est pas toujours la même que celle de Windows : un Outlook 32-bit peut être installé sur une Windows 64-bit, il faut alors prendre la version 32-bit.
Télécharger le connecteur Outlook correspondant à la version de Outlook depuis la section Téléchargements des préférences de BlueMind :
Installation du framework .net 4.0
A partir de la version 3.5.8 de BlueMind l'installeur du framework .net n'est plus inclus dans l'installeur du connecteur Outlook BlueMind.
Si la version 4.0 ou supérieure n'est pas déjà installé sur le poste, l'installeur du connecteur proposera de le télécharger et de l'installer.
Ce téléchargement représentant environ 60Mo, il peut être intéressant lorsque plusieurs machines sont concernées de le télécharger une seule fois ou de lancer une campagne d'installation préalable sur un parc informatique important.
Pour plus d'information sur le framework et son installation, voire la page de l'éditeur https://www.microsoft.com/fr-fr/download/details.aspx?id=17851
Double cliquer sur le fichier .exe téléchargé pour lancer l'installation.
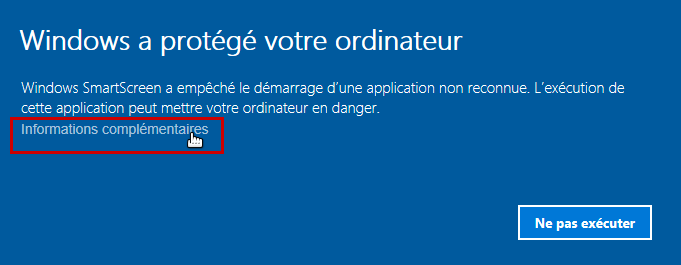
Sur Windows 10, un avertissement de sécurité apparaît, cliquer sur "Informations complémentaires" :
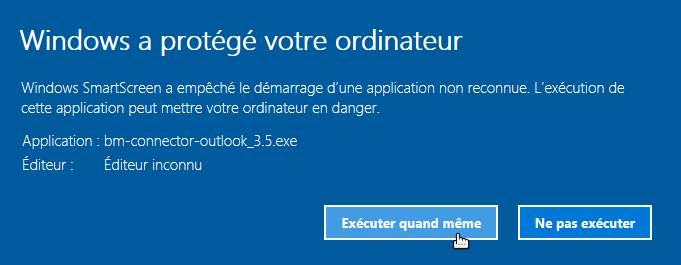
Puis sur le bouton "Exécuter quand même" :
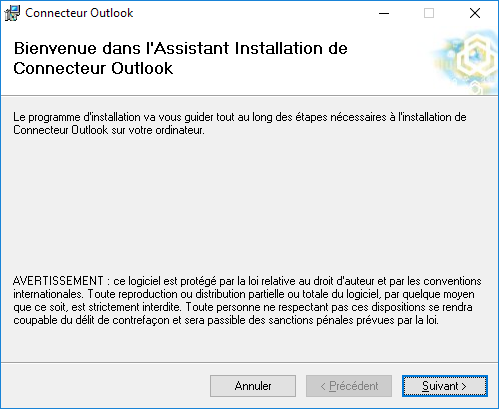
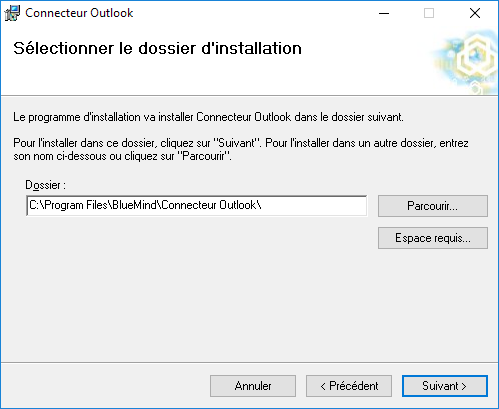
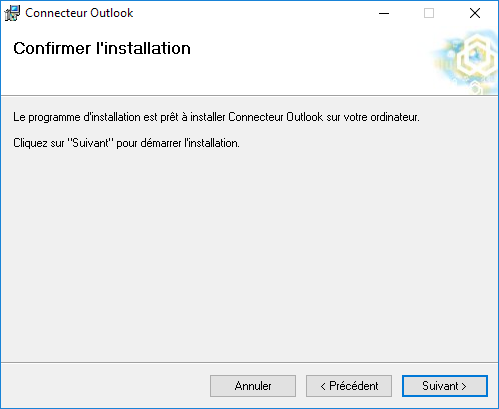
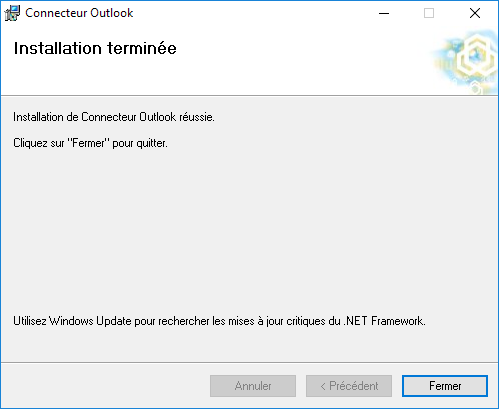
Puis l'assistant d'installation du connecteur se lance. Suivre les 4 étapes de l'installation en cliquant sur "Suivant>" :
Configuration
Une fois installé, il est nécessaire de configurer le connecteur afin de paramétrer le compte BlueMind à synchroniser.
Ouvrir l'écran de configuration de l'accès au serveur BlueMind.
- Outlook 2007 : Menu « Outils/Options » > onglet « BlueMind » > bouton « Connexion »
- Outlook 2010 et suivants : Menu Fichier > BlueMind > bouton «Connexion»
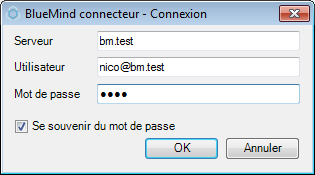
- Configurer :
l'adresse du serveur : exemple « mail.bluemind.loc »
le nom d'utilisateur BlueMind, qui est de la forme utilisateur@domaine.com
le mot de passe BlueMind correspondant
Synchronisation
Automatique
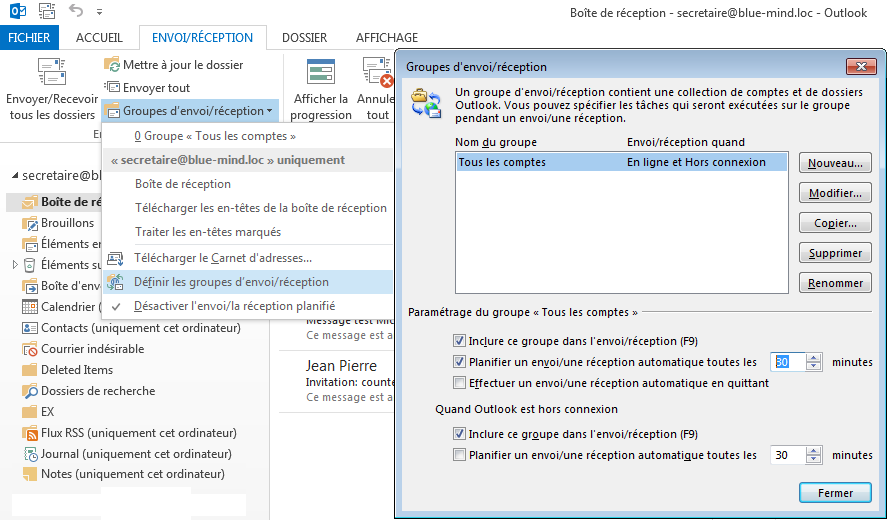
Le connecteur se synchronise avec Blue Mind en tâche de fond après la tâche «Envoyer/Recevoir» d'Outlook qui est réalisée par défaut tout les 30 minutes. Cet intervalle est modifiable en paramétrant les groupes d'envoi/réception :
- Outlook 2007: Menu Outils > Envoyer/Recevoir > Paramètres d'envoi/réception > Définir les groupes d'Envoi/Réception
- Outlook 2010/2013 : Menu «Envoi/Réception» > Groupes d'envoi/réception > Définir les groupes d'Envoi/Réception
L'intervalle minimum conseillé est de 10 minutes pour éviter que des synchronisations s'enchaînent en permanence.
Manuelle
La synchronisation peut être forcée en cliquant sur le bouton synchroniser.
Synchronisation avec Outlook 2007
Synchronisation avec Outlook 2010
Détachement des pièces jointes
Une fois le connecteur installé, la fonctionnalité de détachement des pièces jointes est directement accessible dans la fenêtre de rédaction d'un message.
Fonctionnement de base
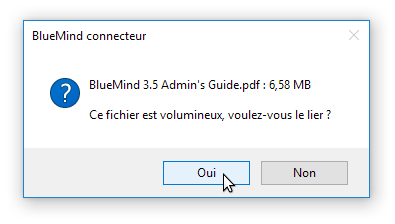
Lors de la rédaction d'un message, glisser-déposer le fichier dans la fenêtre de rédaction. Si celui-ci dépasse le seuil de détachement automatique, Outlook propose de lier le fichier :
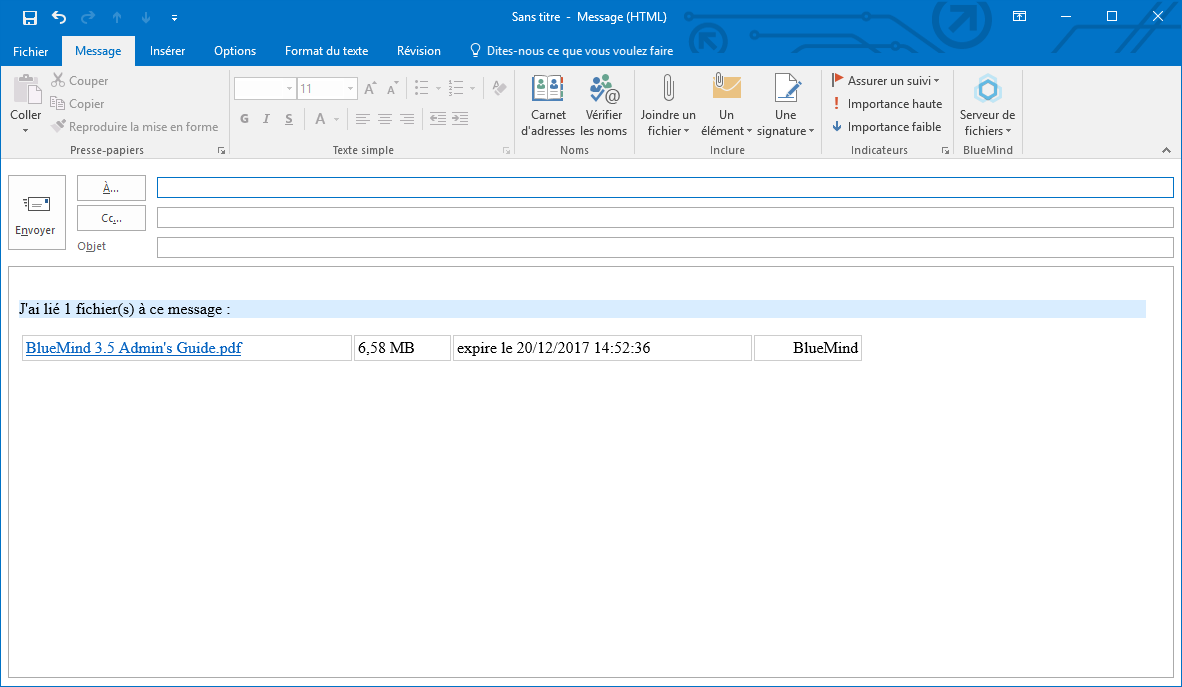
Le fichier est alors déposé sur le serveur BlueMind est un lien est ajouté au message :
Lier directement
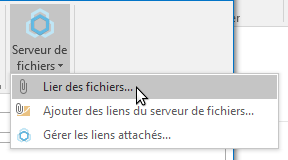
Pour ajouter un ou plusieurs fichiers directement liés, utiliser le menu "Serveur de fichiers" ajouté par le connecteur à la fenêtre de rédaction :
Choisir le ou les fichiers sur l'ordinateur, ils sont aussitôt envoyés sur le serveur et les liens de téléchargement sont ajoutés au message
Le sélecteur de fichiers BlueMind
De même que depuis le webmail BlueMind, le sélecteur de fichiers BlueMind permet d'envoyer des fichiers déjà présents dans l'espace en ligne de l'utilisateur (fichiers qui ont déjà été envoyés et détachés de précédents messages).
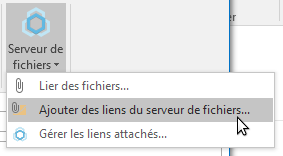
Pour y accéder, utiliser le menu "Serveur de fichiers" > "Ajouter des liens du serveur de fichiers..." :
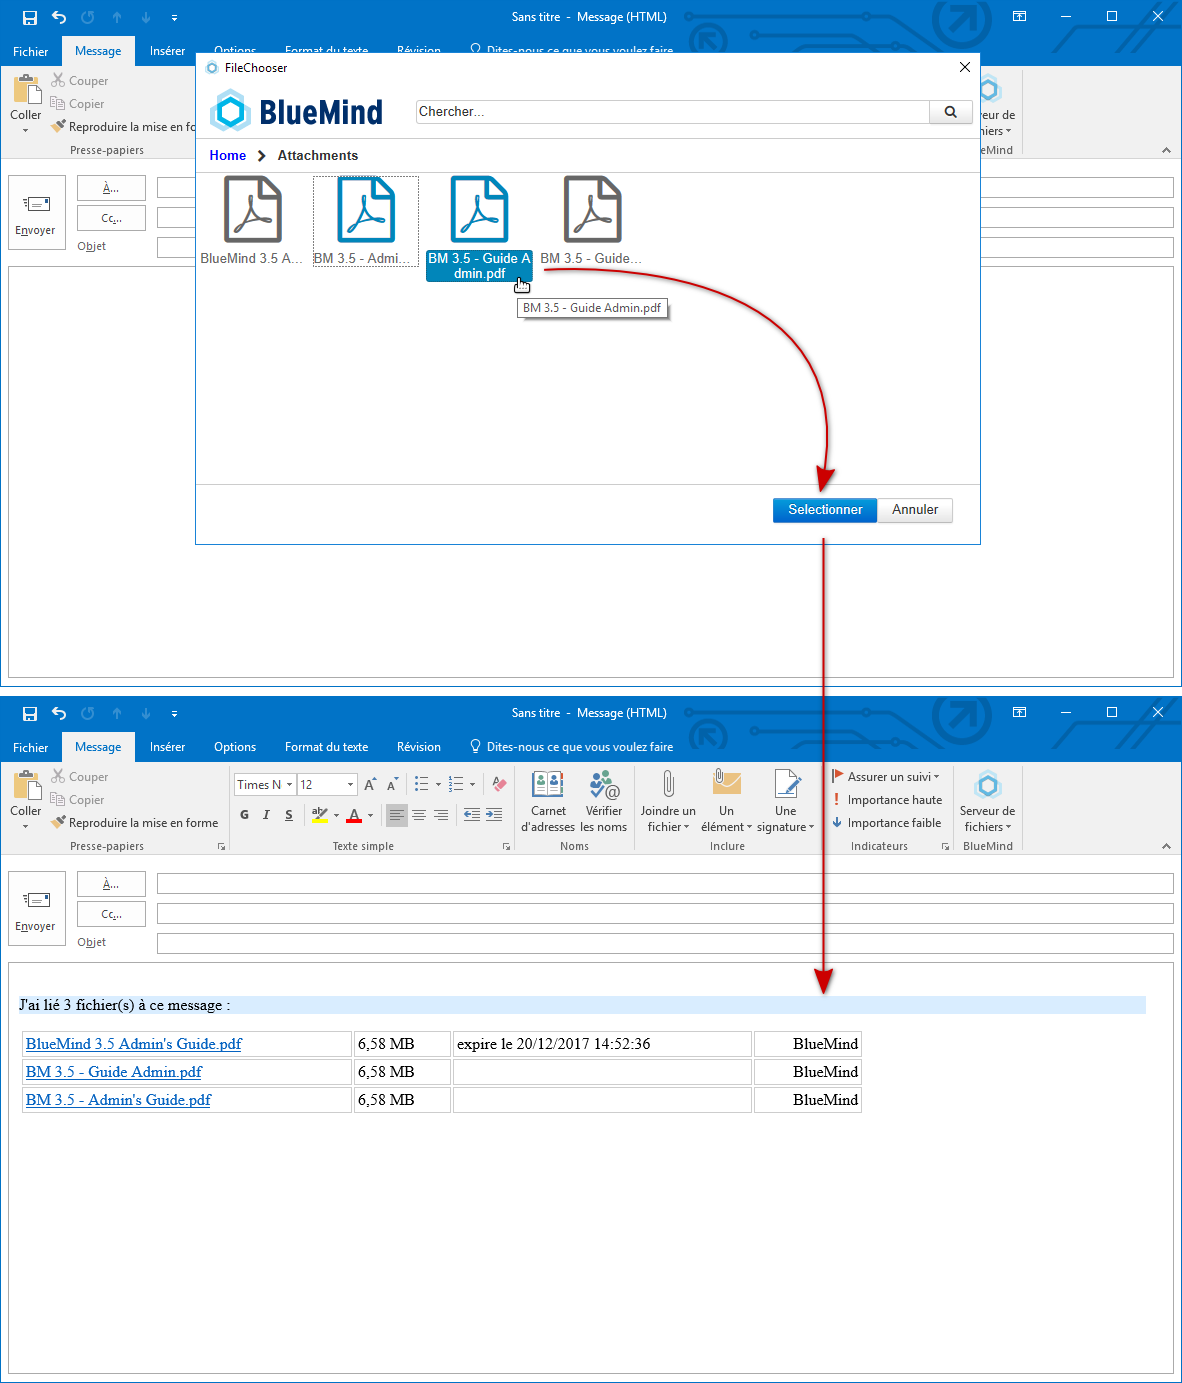
Le sélecteur de fichier de BlueMind s'ouvre, permettant de sélectionner les fichiers disponibles. Cliquer sur un ou plusieurs fichiers puis sur le bouton "Sélectionner" pour les ajouter au message :
Supprimer des fichiers liés
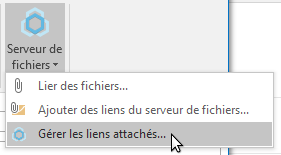
Une fois des fichiers ajoutés à un message, pour les retirer, utiliser le menu Serveur de fichiers > Gérer les liens :
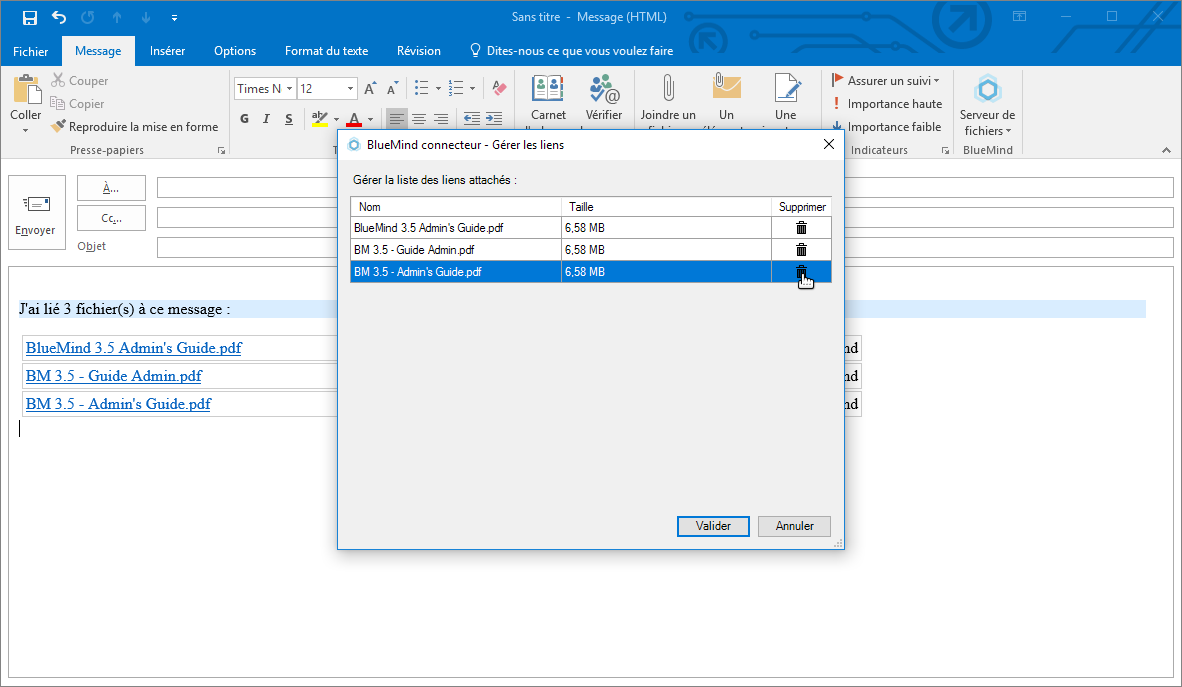
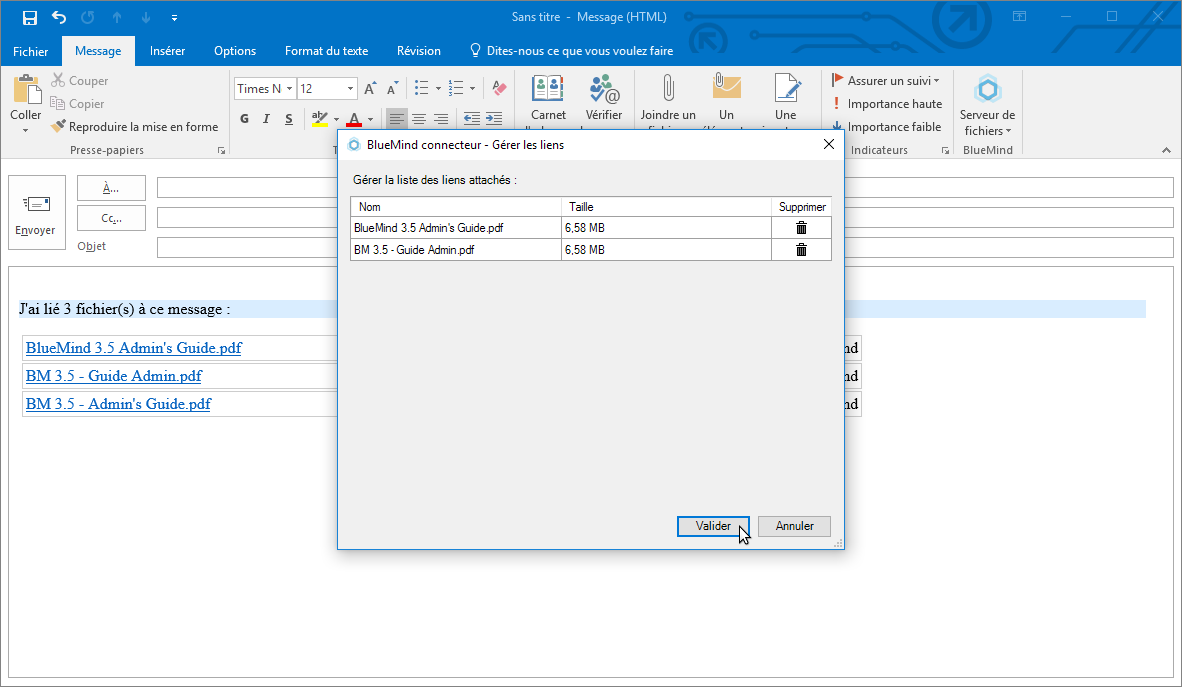
Une fenêtre s'ouvre, contenant la liste des fichiers liés, cliquer sur l'icône poubelle du lien ou des liens à supprimer :
Valider :
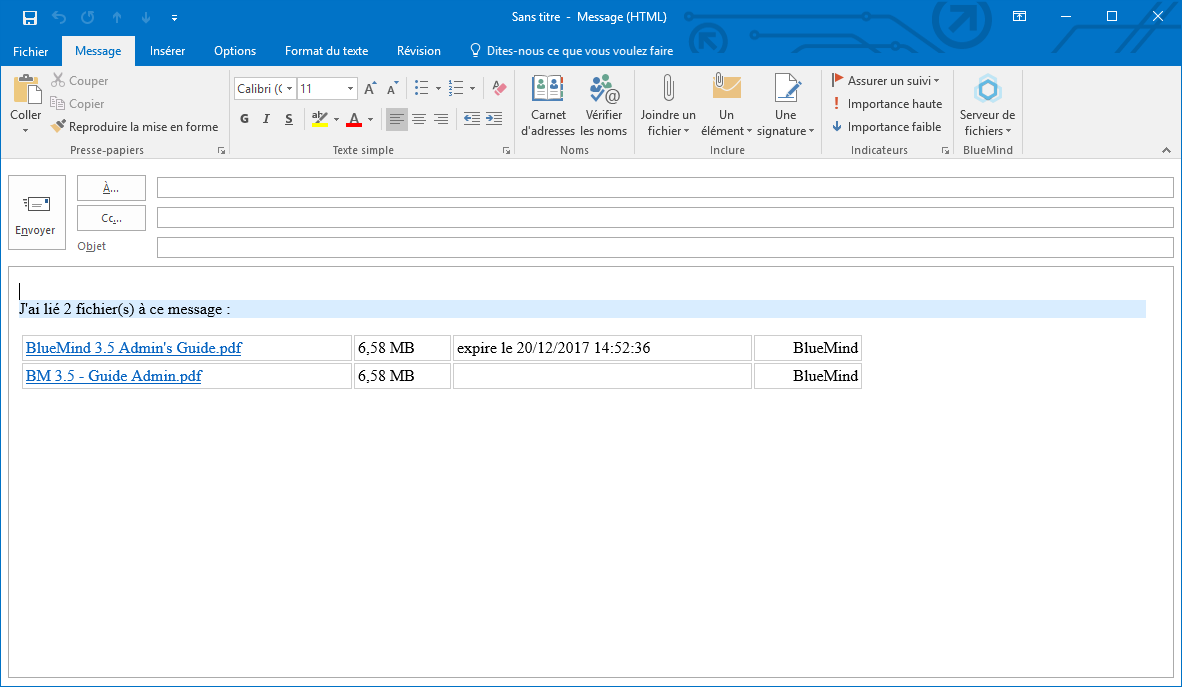
Le lien n'est plus présent dans le message :
Signature d'entreprise
Si une signature d'entreprise est paramétrée, elle sera automatiquement ajoutée à la fin du message par le serveur après son envoi.
Placement de la signature
Si l'administrateur a choisi d'activer l'option adéquate, les utilisateurs peuvent choisir le placement de leur signature.
Pour cela il faut ajouter la chaîne de caractère (tag) --X-BM-SIGNATURE-- à l'emplacement souhaité dans l'email.
Afin de faciliter cette insertion, l'utilisateur peut paramétrer cette chaîne en tant que signature par défaut dans Outlook :
Lors de la rédaction d'un email ou de la réponse à un email, le tag est alors automatiquement placé dans le message :
Même dans le cas présent d'un placement par Outlook, le tag peut toujours être déplacé manuellement par l'utilisateur s'il souhaite temporairement placer la signature à un autre endroit.
La signature est ensuite insérée par le serveur là où le tag se trouve :
L'agenda
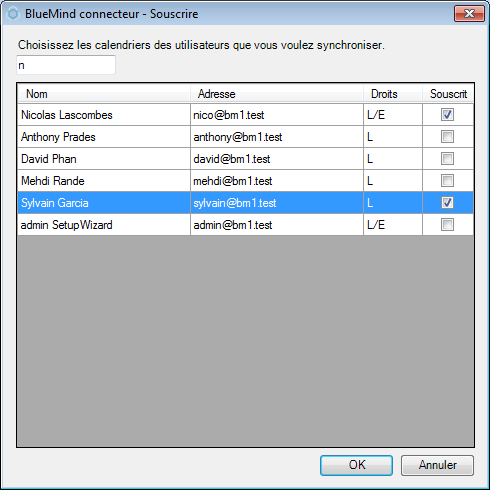
Le connecteur synchronise l'agenda BlueMind de l'utilisateur et il est possible de synchroniser les agendas de collaborateurs ayant partagé leur agenda.
Outlook 2007 : Menu « Outils/Options » > Onglet « BlueMind » > bouton « Souscrire » dans la section « Multi-agenda ».
Outlook 2010 : Menu « Fichier/BlueMind » > bouton « Souscrire » dans la section « Multi-agenda ».
Les droits L/E signifient Lecture et Écriture et L Lecture seule.
Il est possible de filtrer la liste des agendas en utilisant le champ de recherche présent en haut de la fenêtre.
Pour souscrire ou se désabonner d'un agenda, cochez ou décochez la case correspondante.
Il est impossible de supprimer l'abonnement à son propre agenda.
Les contacts
Le connecteur synchronise tous les contacts des carnets d'adresses souscrits.
Par défaut sont synchronisés :
Contacts : le carnet par défaut de l'utilisateur
Contacts collectés : les contacts collectés d'Outlook et de BlueMind.
Annuaire : l'annuaire des utilisateurs de BlueMind.
Les carnets «Contacts» et «Contacts collectés» sont propres à l'utilisateur, il peut y ajouter et modifier les contacts. En revanche, l'Annuaire est un carnet partagé accessible en lecteur seule, seul l'administrateur peut éditer les contacts.
Voir Les contacts
Mes carnets
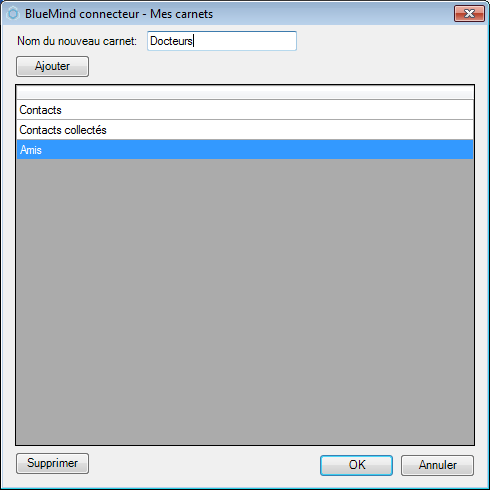
Il est possible de gérer ses carnets de Contacts depuis les préférences.
Outlook 2007 : Menu « Outils/Options » > onglet « BlueMind » > bouton « Mes carnets » dans la section « Contacts ».
Outlook 2010 : Menu « Fichier/BlueMind » > bouton « Mes carnets » dans la section « Contacts ».
Pour créer un nouveau carnet : saisir son nom dans le champ du haut puis cliquer sur Ajouter.
Pour modifier le nom d'un carnet : double cliquer sur son nom dans la liste puis saisir son nouveau nom.
Pour supprimer un carnet le sélectionner dans la liste et cliquer sur Supprimer.
Souscriptions
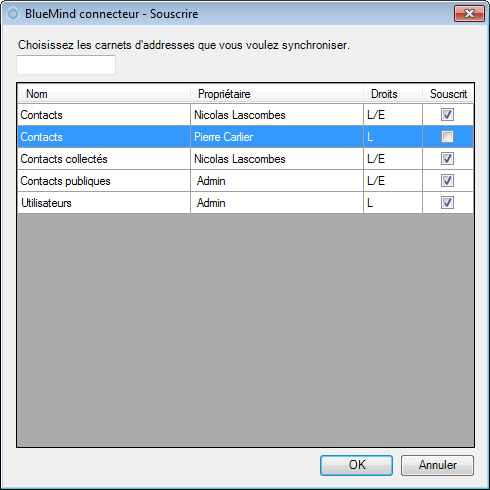
Il est possible de gérer les souscriptions aux carnets d'adresses.
Outlook 2007 : Menu « Outils/Options » > onglet « BlueMind » > bouton « Souscrire » dans la section « Contacts ».
Outlook 2010 : Menu « Fichier/BlueMind » > bouton « Souscrire » dans la section « Contacts ».
Pour souscrire ou se désabonner à un carnet, cliquer sur la case correspondante. Il est impossible de se désabonner du carnet par défaut.
Il est possible de filtrer la liste des Carnets en utilisant le champ de recherche du haut.
Configuration avancée
Des options avancées sont disponibles dans les options.
Outlook 2007 : Menu « Outils/Options » > Onglet « BlueMind » > bouton « Options avancées ».
Outlook 2010 et + : Menu Fichier > BlueMind > bouton « Options avancées » ou « Avancé »
Les actions suivantes sont possibles :
- Réinitialiser : supprime toutes les données BlueMind de Outlook, elles seront récupérées du serveur à la prochaine synchronisation.
- Activer la journalisation détaillée : à activer en cas de dysfonctionnement du connecteur.
- Envoyer un rapport : envoyer les journaux d'erreur du connecteur à BlueMind.
- Import : importer dans BlueMind tous les rendez-vous présent dans le calendrier avant l'installation du connecteur Outlook.
Mise à jour
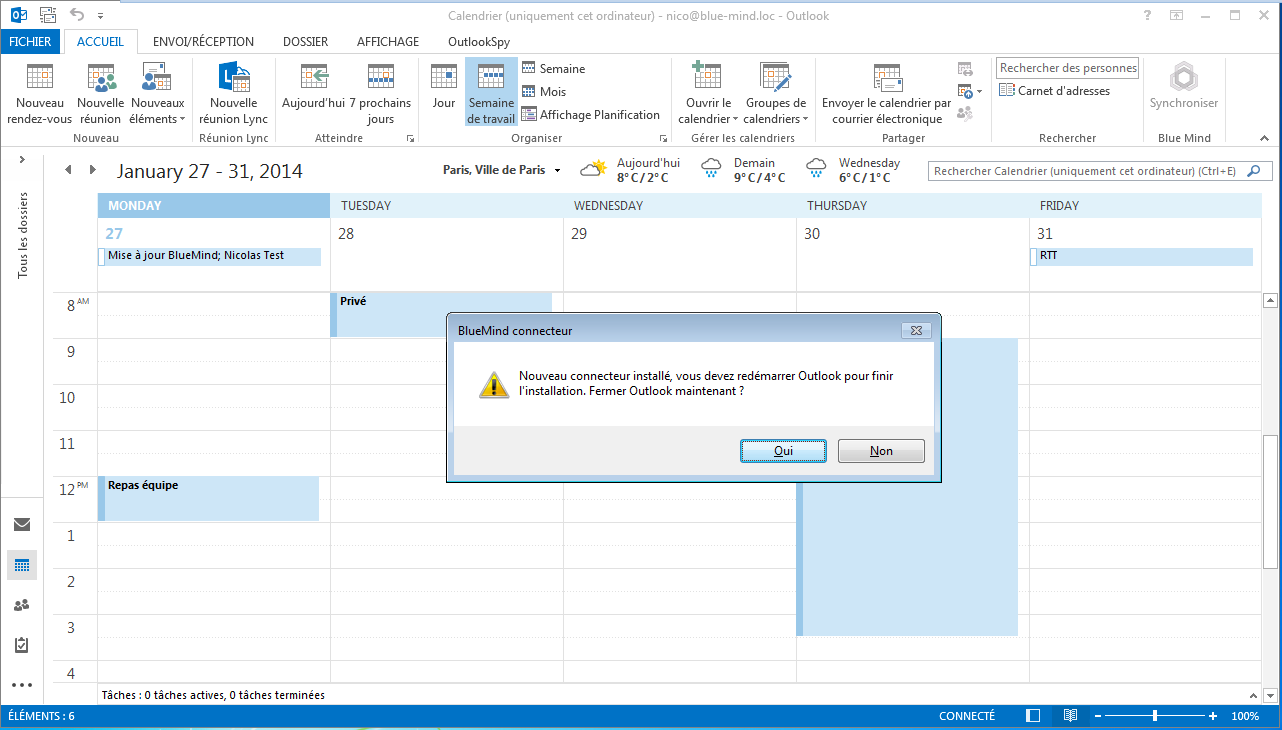
À partir de BlueMind 3 le connecteur Outlook est installé avec un service qui assure sa mise à jour automatique dès que celle-ci est disponible. Lorsque le connecteur détecte une nouvelle version, il la télécharge et l'installe en tâche de fond puis informe l'utilisateur du redémarrage nécessaire si Outlook était en cours d'utilisation :
Mise à jour du connecteur dans Outlook 2013
Mise à jour des anciennes versions
Dans les versions précédentes de BlueMind, la mise à jour se fait manuellement par les utilisateurs : télécharger la nouvelle version depuis la page de préférences utilisateurs de BlueMind puis suivre la même procédure que pour l'installation (voir section précédente).

