
Historique de la page
| Sv translation | ||||||||||||||
|---|---|---|---|---|---|---|---|---|---|---|---|---|---|---|
| ||||||||||||||
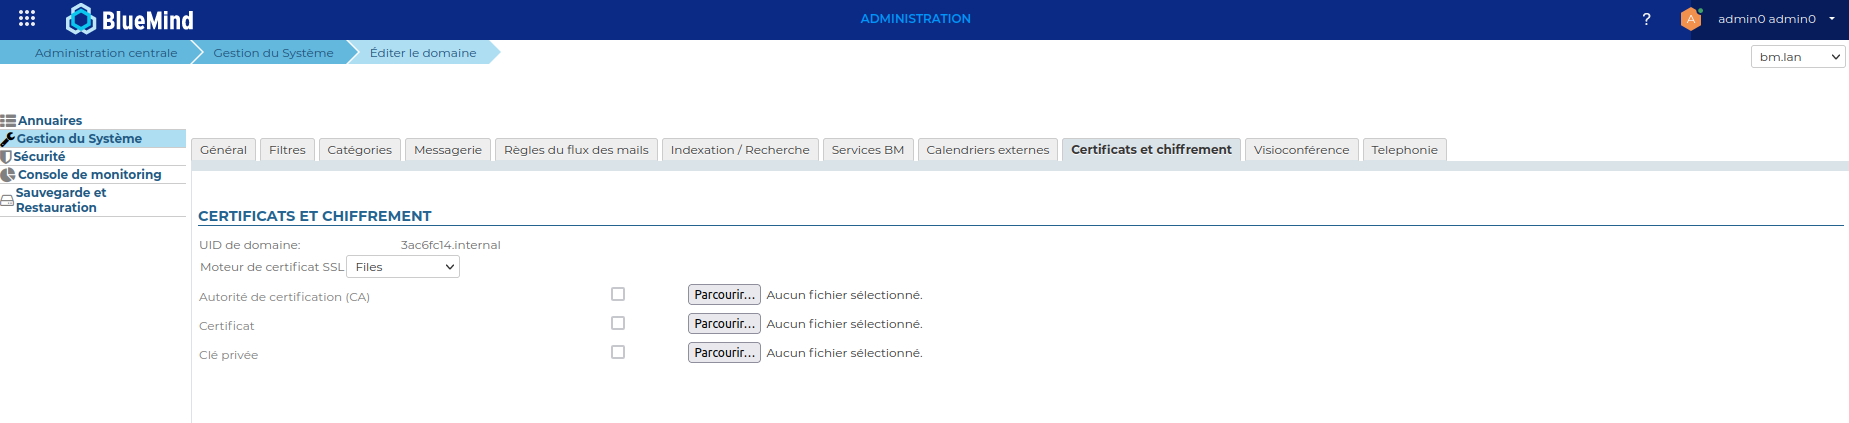
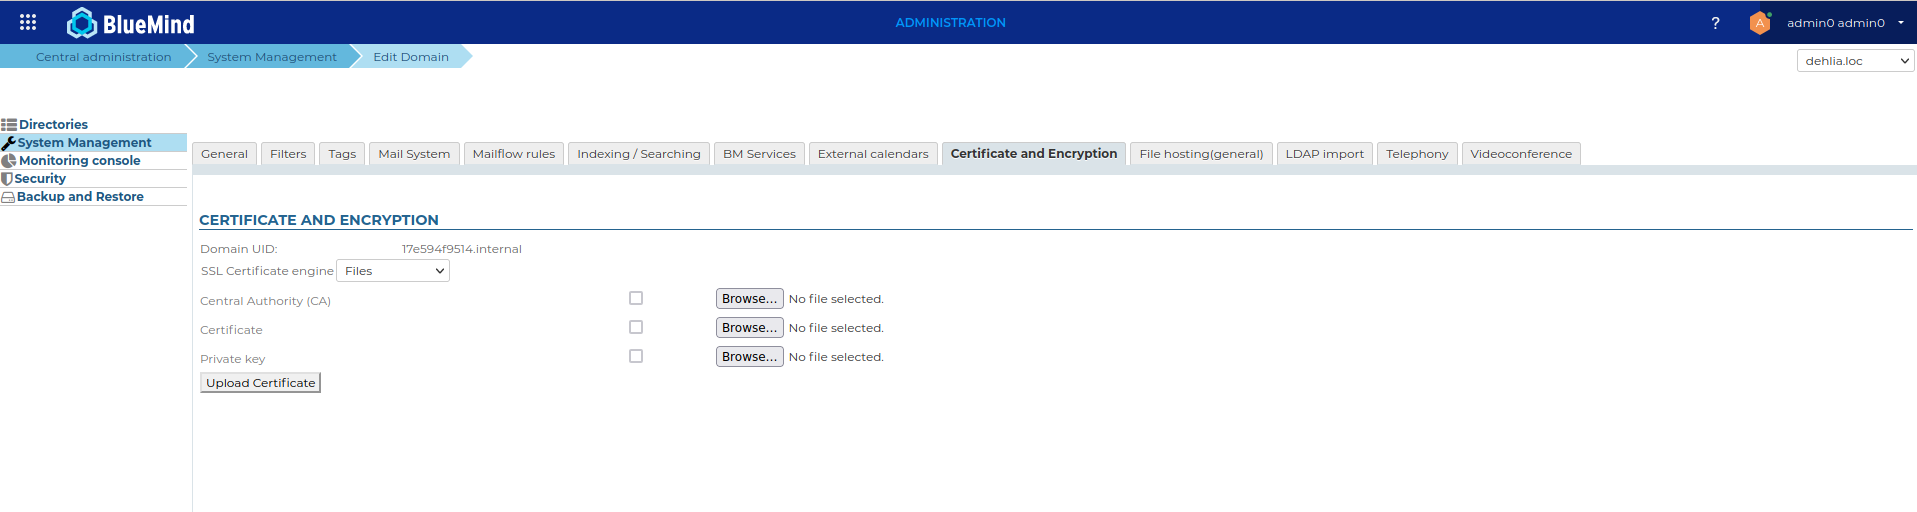
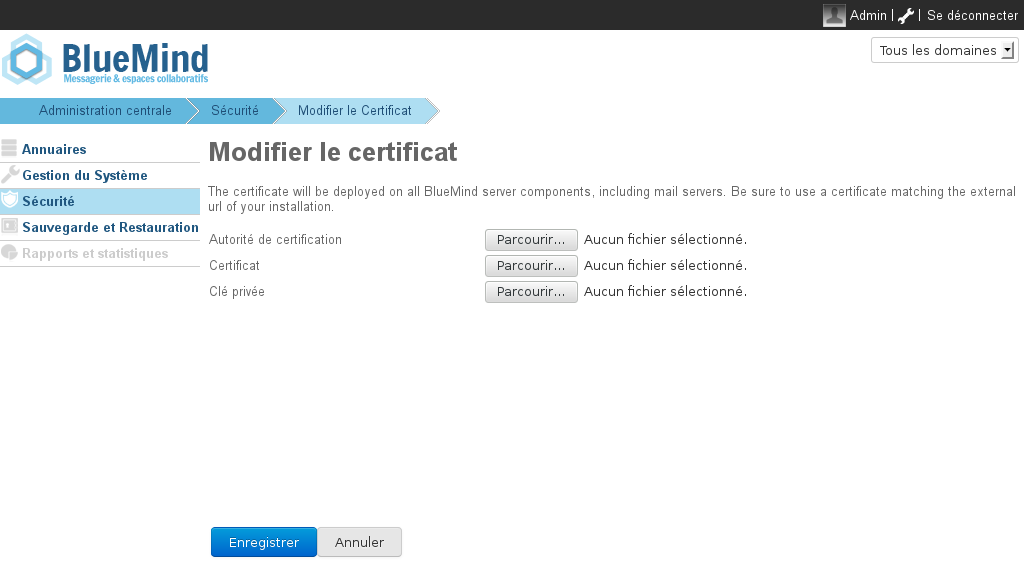
Pré-requisLa messagerie dépend très fortement des certificats et de leur bonne gestion. Par exemple, elle ne fonctionnera plus si vos certificats expirent. Installation du certificatVous devez vous assurer qu'une URL externe a été définie pour le système global ou le domaine concerné par cette installation de certificat (voir le chapitre Configuration des url externes si nécessaire). Fichiers nécessairesVous devez vous assurer que les certificats correspondent à l'URL externe (external-url) de votre messagerie, sans quoi cette messagerie ne sera pas opérationnelle. Afin de mettre en place un certificat SSL, il faut être en possession des 3 fichiers suivants :
Si votre certificat est au format P12, il vous faut générer le certificat et la clé privée au format PEM en utilisant les commandes :
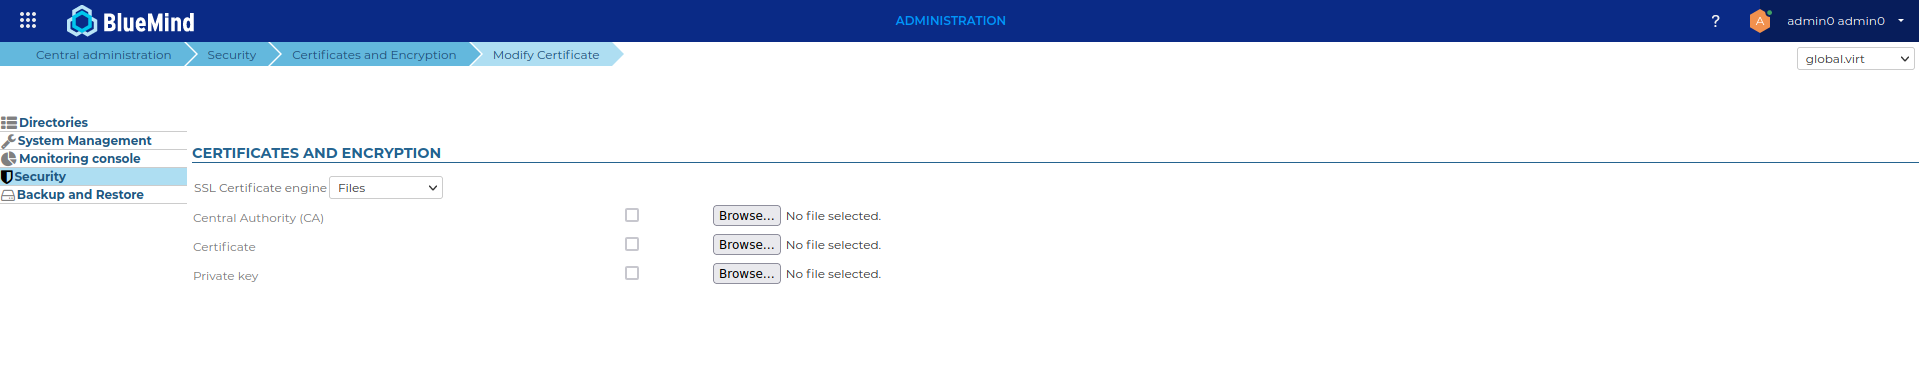
Installation du certificat pour le système global
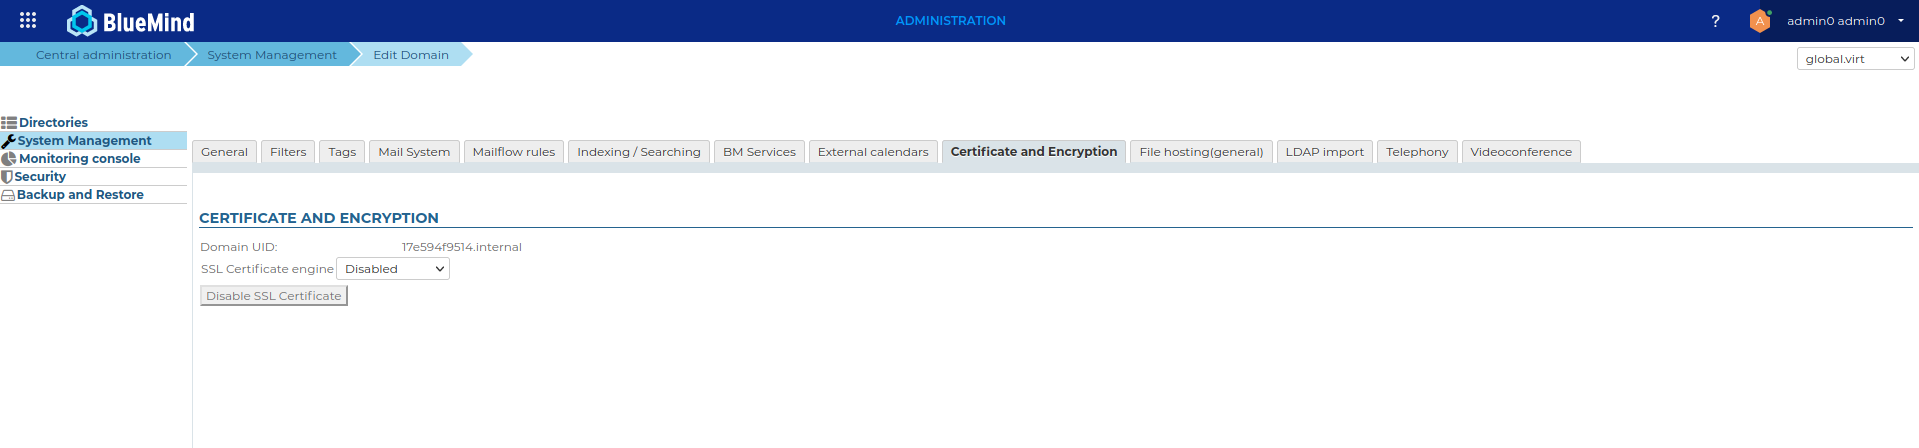
Installation du certificat pour un domaine
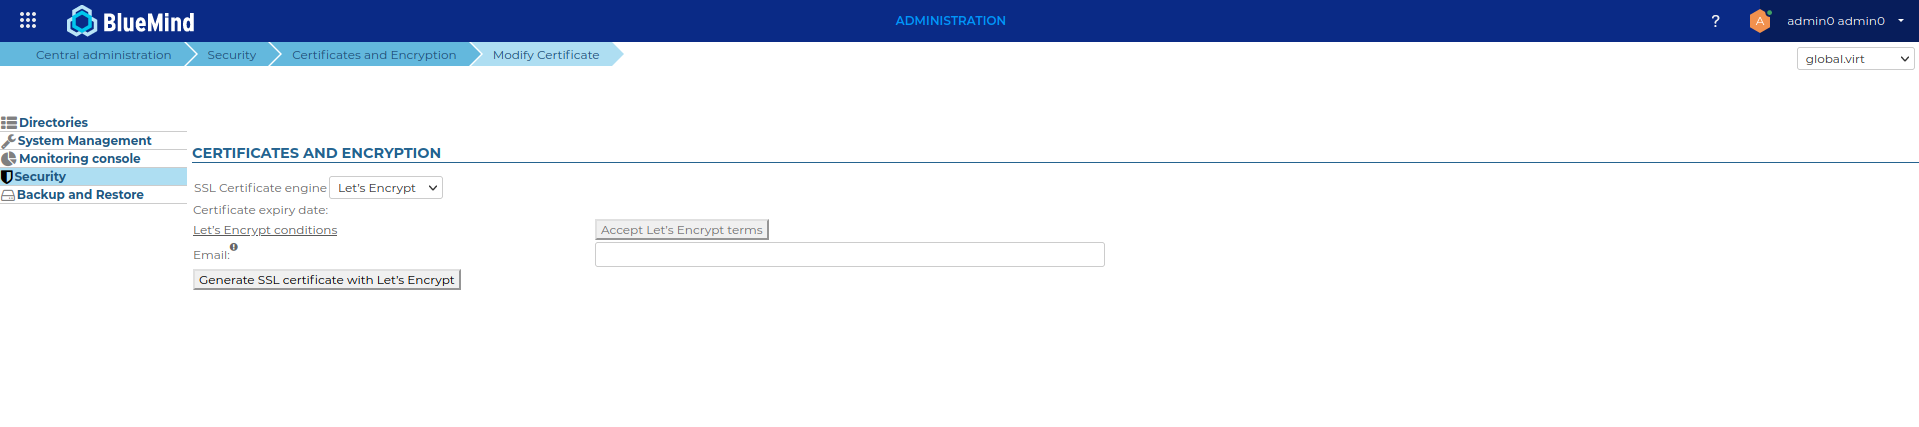
Génération Let's Encrypt
Accepter les conditionsIl est nécessaire d'accepter les conditions de Let's Encrypt avant de pouvoir générer le certificat. L'action sur le bouton acceptera automatiquement les conditions et ouvrira un onglet les présentant.
Une fois l'action effectuée, le bouton permettant la génération du certificat sera débloqué. Générer le certificat pour le système globalIl est possible de saisir une adresse email qui sera utilisée par Let's Encrypt pour communiquer à propos de l'expiration du certificat généré. Si elle n'est pas renseignée une adresse par défaut no-reply@<default-domain> sera utilisée (pour cela un domaine par défaut devra être défini au préalable).
Générer le certificat pour un domaine
Répéter les opérations décrites en 4.1 et 4.2 Renouveler un certificatUne tache programmée se chargera de renouveler automatiquement le certificat Let's Encrypt, si celui ci a déjà été généré une première fois. Cependant il est possible de renouveler manuellement le certificat, en suivant la même procédure que le lors de la génération:
Supprimer un certificat de domaineCette opération aura pour effet de supprimer les certificats de domaine des serveurs.
|


| Sv translation | ||||||||||||||
|---|---|---|---|---|---|---|---|---|---|---|---|---|---|---|
| ||||||||||||||
Prerequisites EnvironmentEmail relies heavily on certificates and their proper management. For example, your email will not work if your certificates expire. You must also make sure that the certificates correspond to your email's external-url, otherwise this email will not work. Certificate installationYou must ensure an external URL has been defined for your system, or for the domain concern by this certificate installation. You can check this in the System Management > System Configuration > Reverse Proxy for the system, and System Management, Manage Domains > <YourDomain> > Generalfor the domain. Files requiredTo set up an SSL certificate, you need the following files:
If your certificate is in P12 format, you must generate the certificate and the private key in PEM format using the commands:
Installing the certificate for the system
Installing the certificate for a domain
Let's Encrypt certificate generation
Accept the conditionsAccepting the Let's Encrypt conditions is mandatory before being able to generate the certificate. Click on "Let’s Encrypt conditions" will open them in a new tab, and the "Accept Let's Encrypt terms" button will automatically accept Let's Encrypt terms & conditions.
Once done, the grey-ed button allowing the creation of the certificate will be unlocked. Generate the certificate for your systemYou may enter an email address that will be used by Let's Encrypt to communicate about the expiration date of the generated certificate. if not provided, a default address 'no-reply@<default-domain>' will be used (a default domain must be define in the System Management beforehand). |

| Remarque |
|---|
This "Disable" option is only available for a domain, not for the system |
| Ancre | ||||
|---|---|---|---|---|
|
- SSL & TLS: A beginner's guide to certificates: https://www.isicca.com/en/ssl-tls-certificate-beginner-guide/
| Sv translation | ||||||
|---|---|---|---|---|---|---|
| ||||||
VoraussetzungenUm ein SSL-Zertifikat einrichten zu können, müssen Sie über folgende 3 Dateien verfügen:
Wenn Ihr Zertifikat im P12-Format vorliegt, müssen Sie das Zertifikat und den privaten Schlüssel im PEM-Format mit den Befehlen erzeugen:
Installieren des Zertifikats
|
Vue d'ensemble
Gestion des contenus
Apps