
Historique de la page
...
| Sv translation | ||||
|---|---|---|---|---|
| ||||
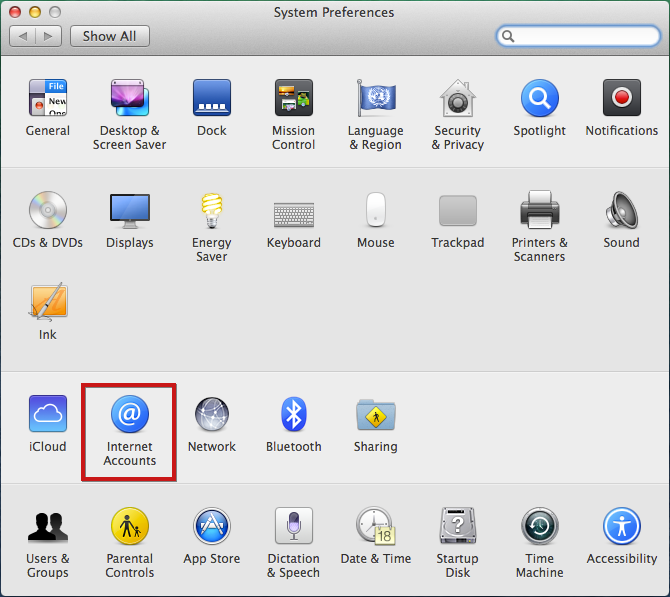
Setting up a CardDAV accountCreating an accountGo to the internet accounts section in System Preferences > "Internet Accounts":
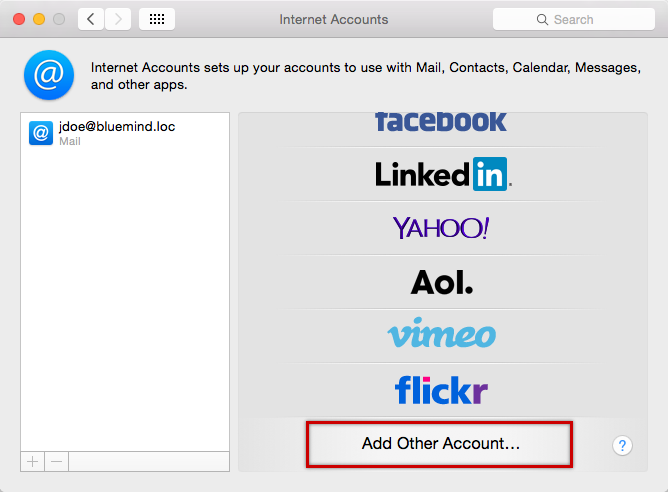
Select "Add Other Account":
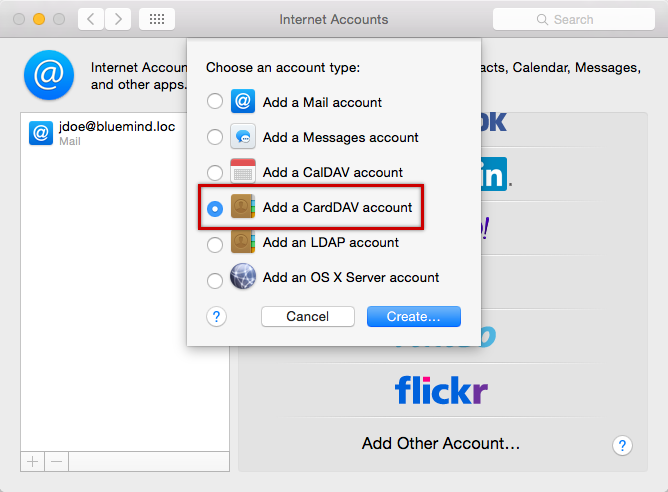
Select "Add a CardDav account":
Validate by clicking "Create". Enter the user account connection information:
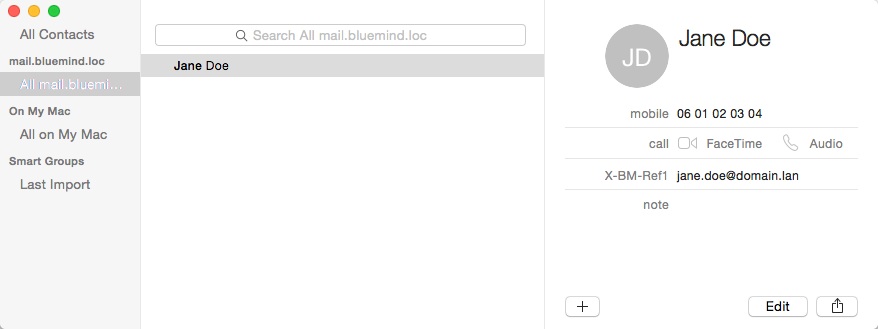
Validate by clicking "Create". The Contacts application opens and shows the contacts:
|

| Sv translation | |||||||
|---|---|---|---|---|---|---|---|
| |||||||
Konfiguration eines CardDAV-KontosKontoerstellungGehen Sie in die Internetkonten-Verwaltung: Systemeinstellungen > „Internet Accounts“ („Internetkonten“):
Wählen Sie „Add other account“ („Anderes Konto hinzufügen“):
Wählen Sie „Add a CardDav account“ („CardDav-Konto hinzufügen“):
Bestätigen Sie mit der Schaltfläche „Create“ („Erstellen“) Geben Sie die Anmeldeinformationen für das Benutzerkonto ein:
Bestätigen Sie durch Klicken auf „Create“ („Erstellen“) Die Anwendung „Kontakte“ wird geöffnet, indem die Kontakte präsentiert werden:
|
Vue d'ensemble
Gestion des contenus
Apps