Managing resource types
In the admin console, go to Directories > Resource types to view and manage the types of resources available.
 Image Removed
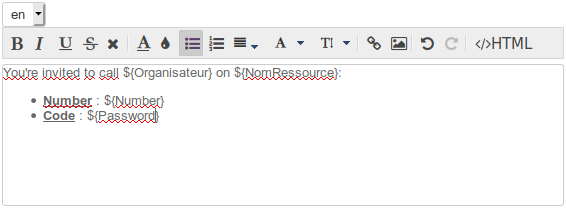
  Image Added À partir de BlueMind 3.5.13 4.1, il est possible de définir des patrons de description d'événements. Lors de l'invitation d'une ressource de ce type à un événement, le patron sera automatiquement inséré dans la description de l'événement. Ces patrons peuvent contenir des variables et être définis dans plusieurs langues afin de s'adapter à la langue de l'organisateur de la réunion.
Creating a new resource type type
To add a new resource type, click the "New" button and fill in the information:
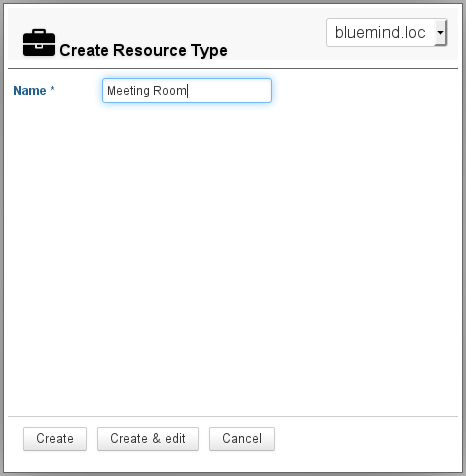
Next click "Create" to quickly create a resource type or "Create & edit" to create a resource type and access further customization options (see "Editing a resource type").
Editing a resource type
To edit a resource type, click it in the list of available types.
The resource editing window enables you to change the label, add a default icon and edit or add custom properties.
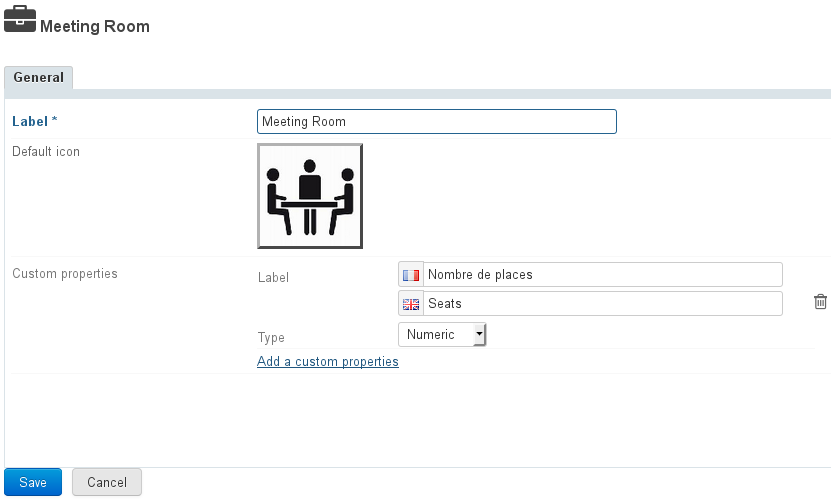 Image Removed
Créer un patron de contenu
À partir de BlueMind 3.5.13 il est possible de définir un patron : ce texte sera automatiquement ajouté à la description d'une réunion lorsque la ressource y sera invitée.
Pour créer un patron :
- sélectionner la langue souhaitée
- remplir le champs de contenu
 Image Removed
 - Cliquer sur
 Image Removed pour enregistrer les changements.
Patron multilingue
Ajout d'une langue
Pour créer d'autres langues :
| Remarque |
|---|
Lors de la création d'un événement, le contenu sera ajouté en fonction de la langue de l'organisateur. |
Suppression d'une langue
Pour supprimer le patron d'une langue :
- sélectionner la langue souhaitée dans la liste déroulante
- vider le champs de contenu (sélectionner le texte et le supprimer)
- Cliquer sur Image Removed pour enregistrer les changements.
Utilisation de variables
Le patron peut contenir des variables, qui seront à renseigner dans la ressource de ce type puis remplacées automatiquement dans le patron par le système lors de la création de l'événement.
Comme indiqué dans l'aide en ligne au dessus du formulaire, 2 variables existent pour tous les types et toutes les ressources :
- ${NomRessource} : le nom de la ressource définie dans Entrée d'Annuaire (ne pas confondre avec le Libellé du type de ressource)
- ${Organisateur} : le nom de la personne créant l'évènement dans le Calendrier
D'autres variables peuvent être créées au moyen des Propriétés personnalisées .
Pour cela, cliquer sur le lien "Ajouter une propriété personnalisée" :
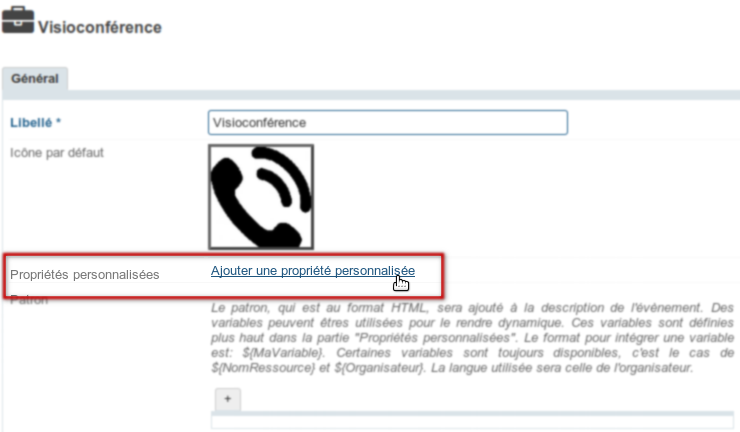 Image Removed
Remplir le libellé (en Français et en Anglais) et choisir le type de variable :
 Image Removed
3 types de variables sont possibles :
- Numérique : contiendra obligatoirement un nombre
- Texte : contiendra une chaîne de caractère
- Case à cocher : dans ce contexte de patron de description d'événement, ce type n'a pas d'intérêt, nous déconseillons son utilisation
Pour insérer une variable dans la patron on utilisera ensuite la syntaxe ${libellé} .
Soit par exemple le type de ressource ci-dessus en exemple : Visioconférence. Chaque ressource correspondra à un pont de conférence et aura donc 2 variables :
- Numéro : le numéro de téléphone
- Code confidentiel : le mot de passe permettant d'accéder au pont
On remplira comme patron :
| Bloc de code |
|---|
-FR- <br/>
Vous êtes invité(e) à appeler ${Organisateur} sur ${NomRessource} au numéro suivant :
<ul>
<li>Numéro : ${Numéro}</li>
<li>Code confidentiel : ${Mot de passe}</li>
</ul> |
Dans la fiche d'administration de la ressource, ces champs seront à remplir dans la section "Autre" :
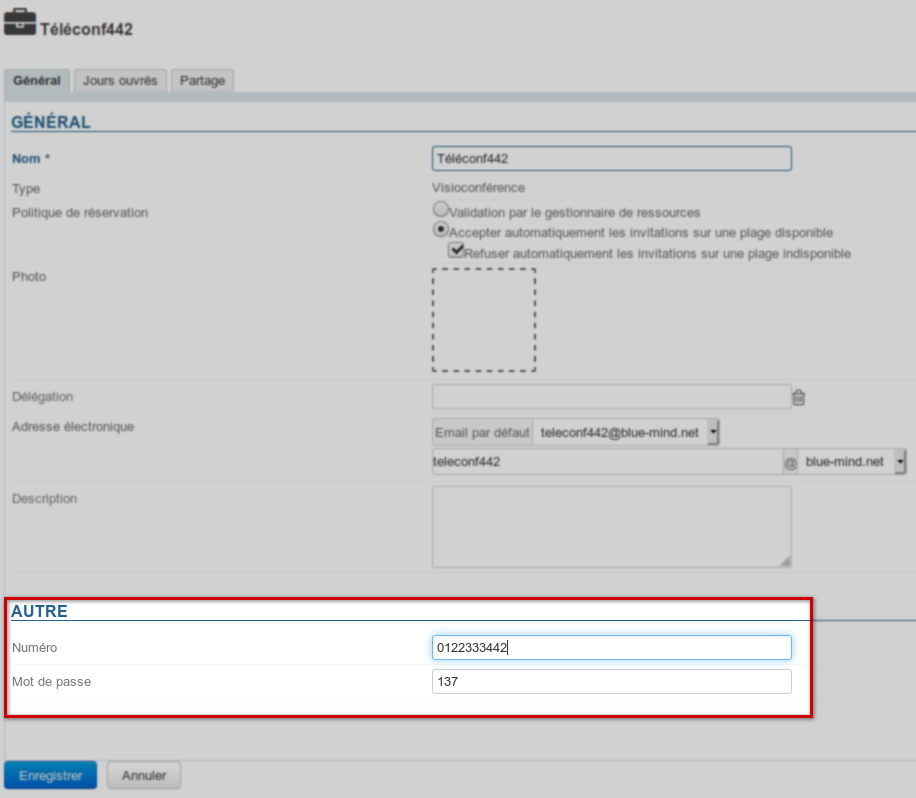 Image Removed
Enfin, lorsque cette ressource sera invitée à une réunion, la description de celle-ci sera complétée avec le patron et les valeurs de variables :
- dans l'événement d'agenda :
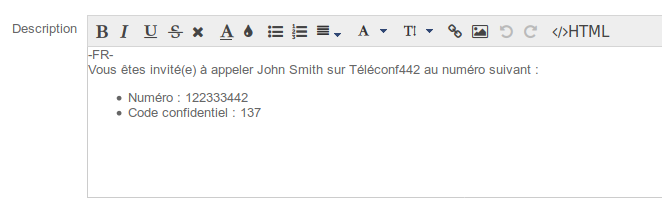 Image Removed
 - dans l'email d'invitation, dans lequel la description est reprise :
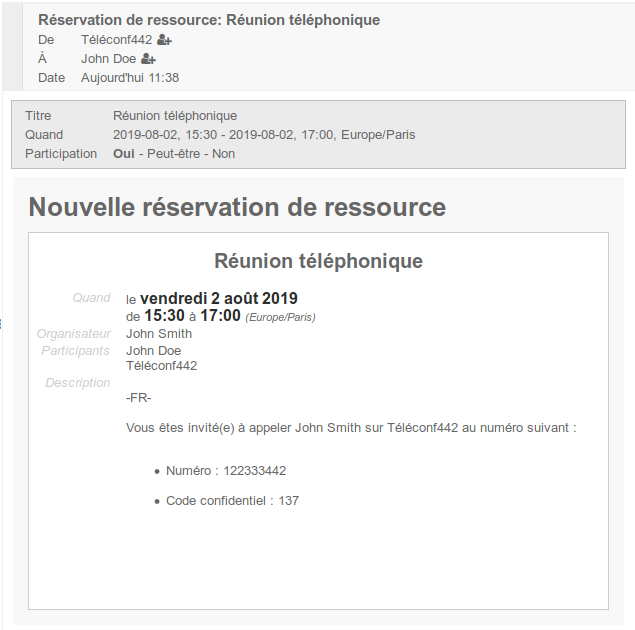 Image Removed
| Remarque |
|---|
|
Dans le cas où plusieurs patrons sont paramétrés, correspondant à plusieurs langues, c'est le patron de la langue de l'organisateur qui est ajouté à la description de l'événement. |
you to change the label, add a default icon and edit or add custom properties.
Image Added
Managing resources
Creating a resource
In the Directory Browser, click "New" > "Resource" and fill in the information for the resource you want to create:
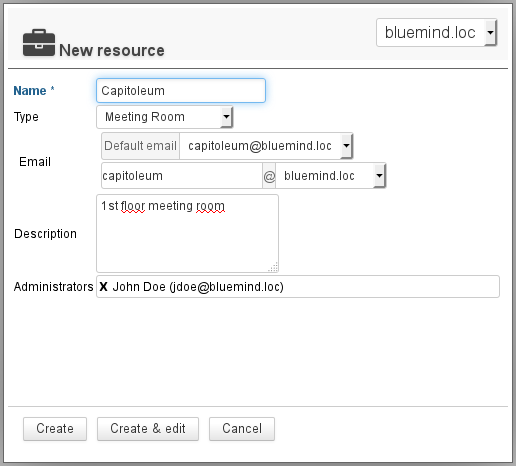
- Only the name and email address are required
Note: the address is completed automatically when a name is typed. Before you confirm, make sure it doesn't contain any special characters (uppercase, accents...) - the The managers assigned are given sharing privileges "Can edit my events and manage my shares".
This can be changed later on and other managers can be assigned. See the next chapter "Sharing a resource".
Next click "Create" to quickly create a resource or "Create & edit" to create a resource and access further customization options (see "Editing a resource").
| Ancre |
|---|
| editer-ressource |
|---|
| editer-ressource |
|---|
|
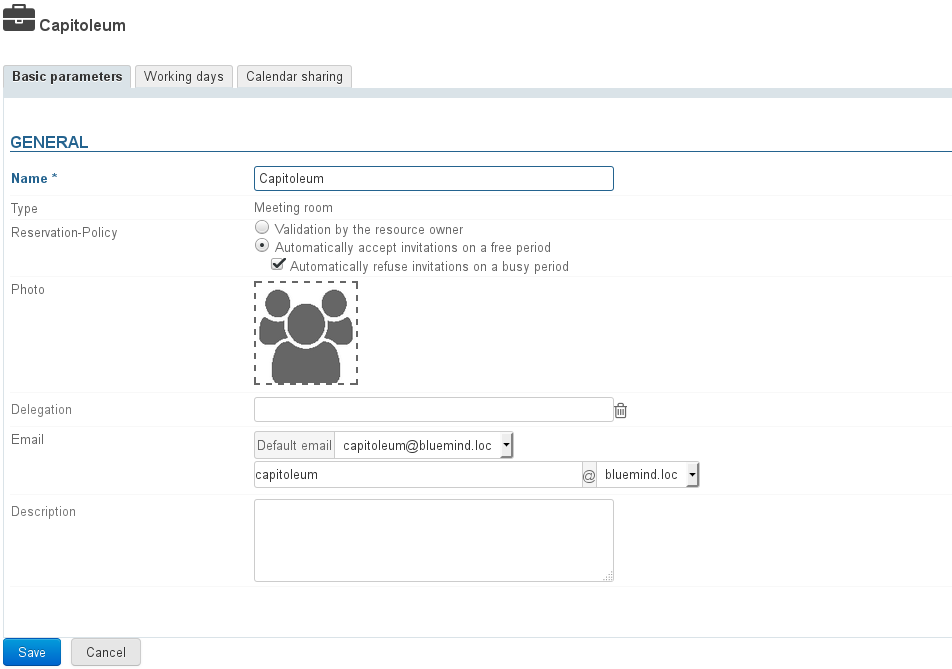
Editing a resource
To edit a resource, click its name in the list of available resources.
General
Properties
The resource editing window enables you to change the parameters set on creation and add custom fields (capacity, description, etc.):
| Astuce |
|---|
To add or change a resource's picture (avatar), click the blank picture box or the existing photo. |
Booking policy
Image RemovedFrom BlueMind 3.5.5, administrators Administrators can choose to allow or prevent multiple bookings (overbooking) for a resource:
- Validation by the resource owner: the resource's participation status remains "pending" until its the manager accepts or rejects the invitation.This is how BlueMind used to work, and it still applies for old resources and resources migrated from BlueMind 3.0 during the version update.
- Automatically accept: the resource manager receives booking requests and participation is confirmed automatically if the resource is available for the requested timeslot (within working hours and no other booking confirmed)
This is how bookings now work for newly-created resources.
- Automatically reject: the resource manager receives booking requests and participation is rejected automatically if the resource is not available for the requested timeslot.
This option cannot be dissociated from automatically accepting.
This allows managers to accept bookings automatically when the resource is available while choosing what to do when it is not (to organize a meeting out of working hours, to prioritize a more important request that comes in later, etc.)
| Astuce |
|---|
Note that only administrators have access to these settings, resource managers continue to be users who have been given the right to edit a resource calendar (accept/reject/edit events). |
Available hours
The new "Working days" tab allows you to set resource availability days and times, as well as the minimum duration they can be booked for (1hr, 2hrs, half-day, day) and time zone:

| Info |
|---|
These settings are for information purposes only and will not stop users making reservations outside available hours or for a shorter period. |
| Ancre |
|---|
| partage-ressource |
|---|
| partage-ressource |
|---|
|
Sharing a resource
By default, public share privileges for resources are set to "can book this resource and see its bookings": all domain users can see the calendar and request access to this resource by adding it to an event.
To modify change public share rights level and/or grant additional rights (to the resource administrator or specific users, for example), click the "Calendar sharing" tab:

Possible rights are:
- Can book the resource: users can make resource booking requests
- Can book this resource and see its bookings: in addition to the right above, users can see the resource calendar and its availability
- Can edit its bookings: users become resource managers, they receive booking request messages, they can accept, reject or edit the event the resource is invited to. They can also write into the resource calendar to create events.
- Can edit its bookings and manage sharing: in addition to the right above, users can access the resource's sharing options and edit the corresponding rights
This tab also allows you to share the calendar externally and manage its availability (freebusy).
For more information on sharing, go to Managing shares.
Using a resource
To connect a resource to an event, simply add it to the list of participants (as you would a user) when creating an event.
Once the event is created, the resource's managers (those with calendar modification privileges) can accept or reject the invitation request through their calendar or the invitation message itself (provided a request was sent).
To find out more about using resources, see the user's guide page on Les ressources.