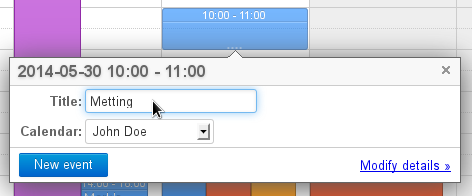
The "Modify details" link takes you to the detailed event creation window.
Creating a detailed event
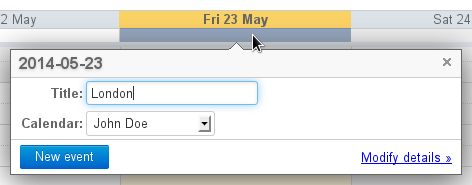
Click "New event" at the top of the sidebar to open the event creation window:
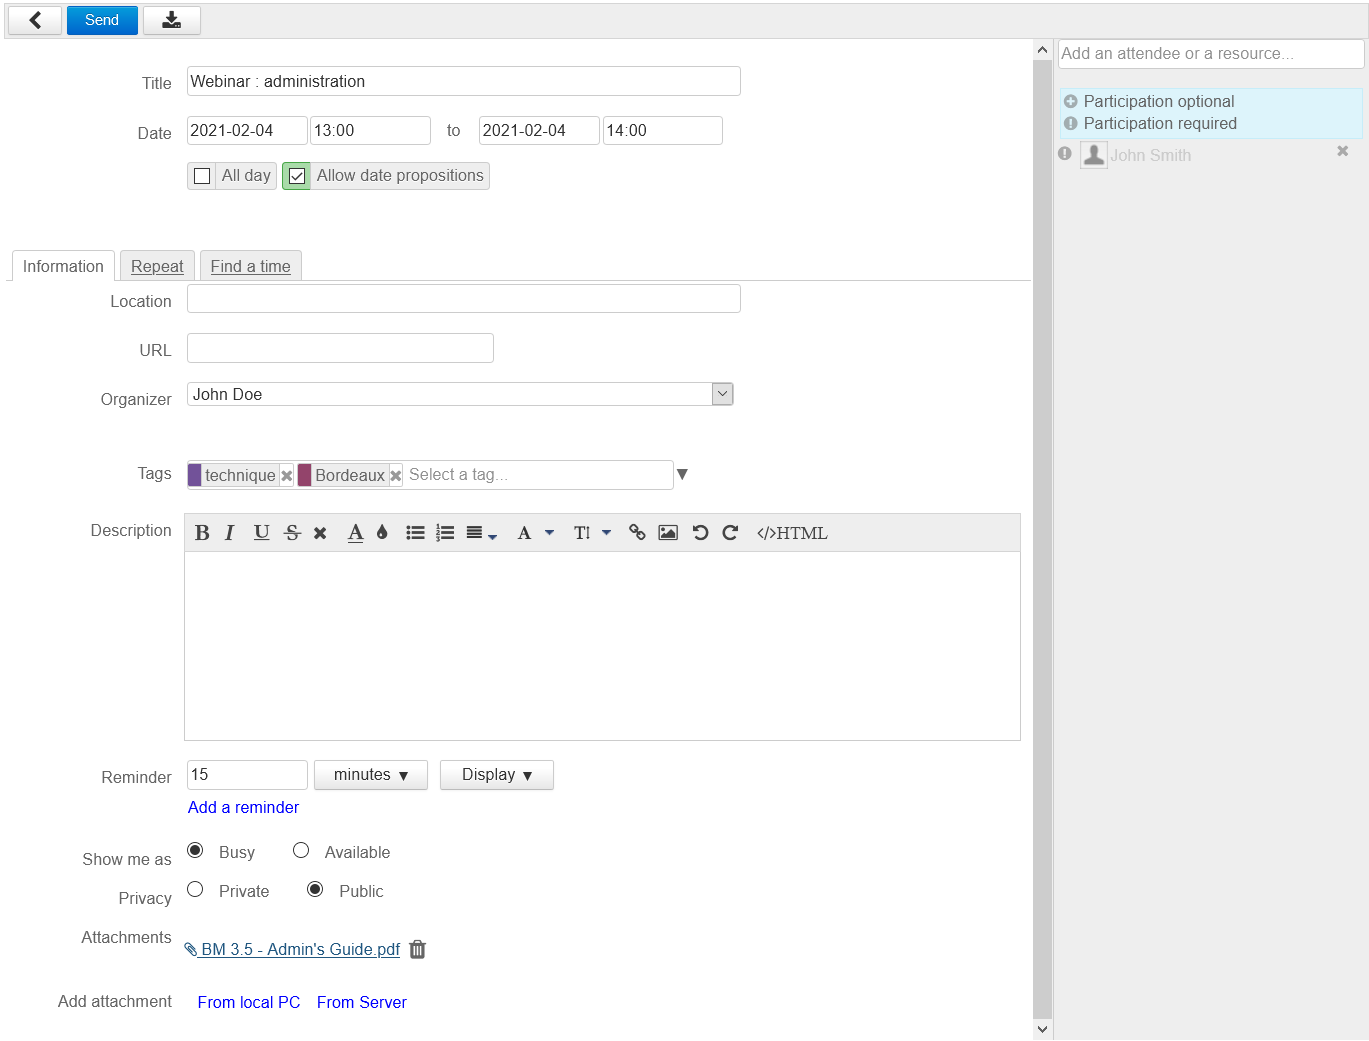
Key event details are shown at the top of the page.
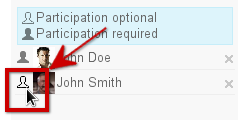
You can invite others in the right-hand side of the window. Click the icon before each guest's name to set their participation as optional or required:
Note:
- You can invite anyone in the domain who has given you invitation rights (share right "can invite me to an event" (see Sharing Calendars below).
- You can invite anyone in your address books or anyone else simply by typing their email address.
- You can also associate resources to events by adding them the same way you add participants .
- When you add a group, each group member is added individually.
Tabs give you access to additional features: recurring events and availability search.
Event properties
The "Information" tab is used to specify set key event properties:
Recurring events
Recurring events
Go to the Go to the "Repeat" tab to set how often an event is repeated: daily, weekly, monthly or yearly.
- Enter the repeat period (e.g.: every two weeks) in the "Repeat every" text box under the Repeat drop-down menu.
- For events repeated weekly, mark the day(s) you want the event repeated.
- For events repeated monthly, you must specify whether you want the event to be repeated on a day of the month (e.g.: the 3rd of every month) or a day of the week (e.g.: every second Tuesday of a month).
| Astuce |
|---|
A sentence summarizing the repeat settings above the "Repeat" tab is updated as you fill in the form: 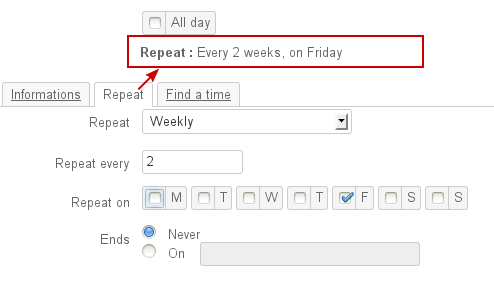
|
To delete one instance of an event:
- Display the event.
- Click the event, then click "Delete".
- Select "Only this instance" to keep other instances.
Availability search
The "Find a time" tab allows you to search for a common available time slot for event guests:
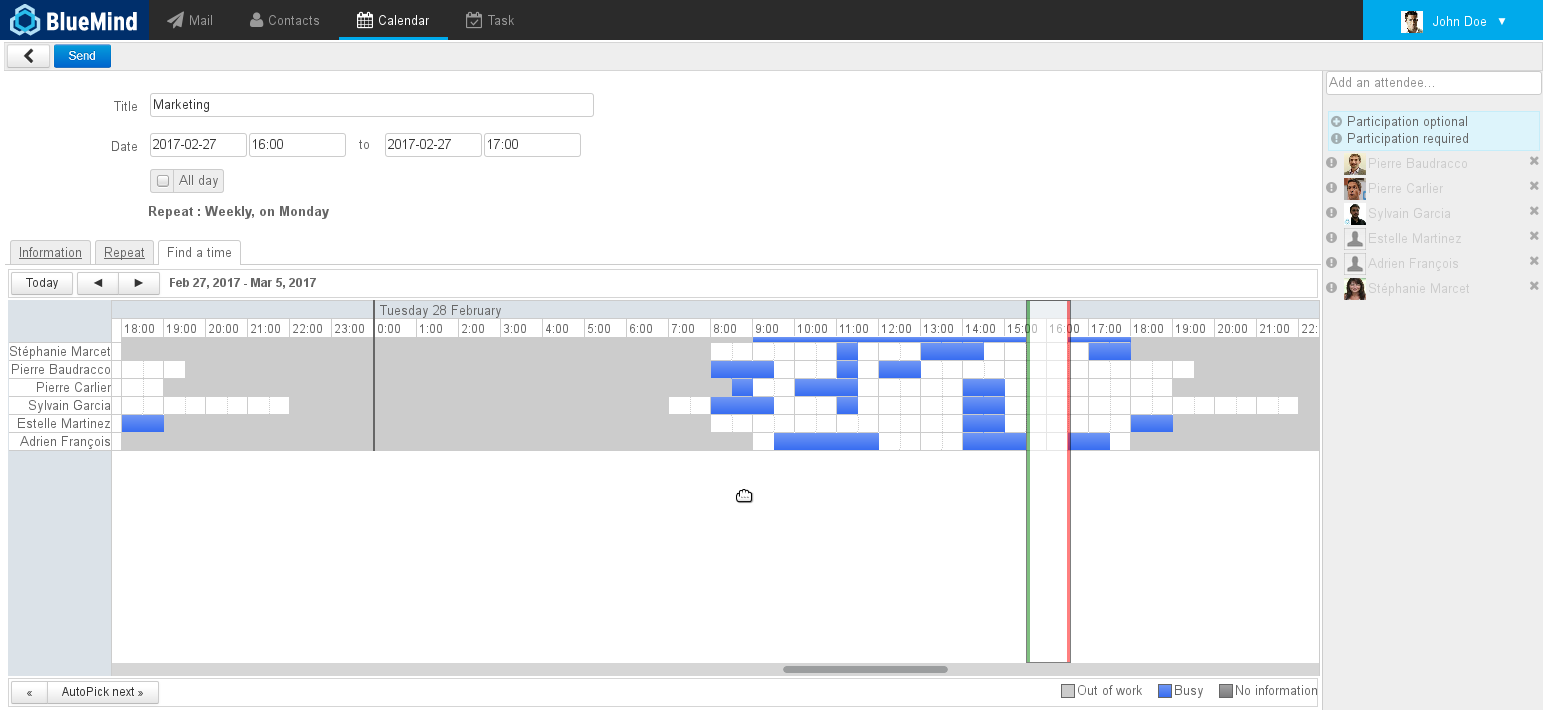
BlueMind automatically suggests the first available slot, shown between a green line and red line, based on the date entered in the form.
You can drag and move the whole slot with your mouse, or widen or narrow it by dragging the green and red lines separately.
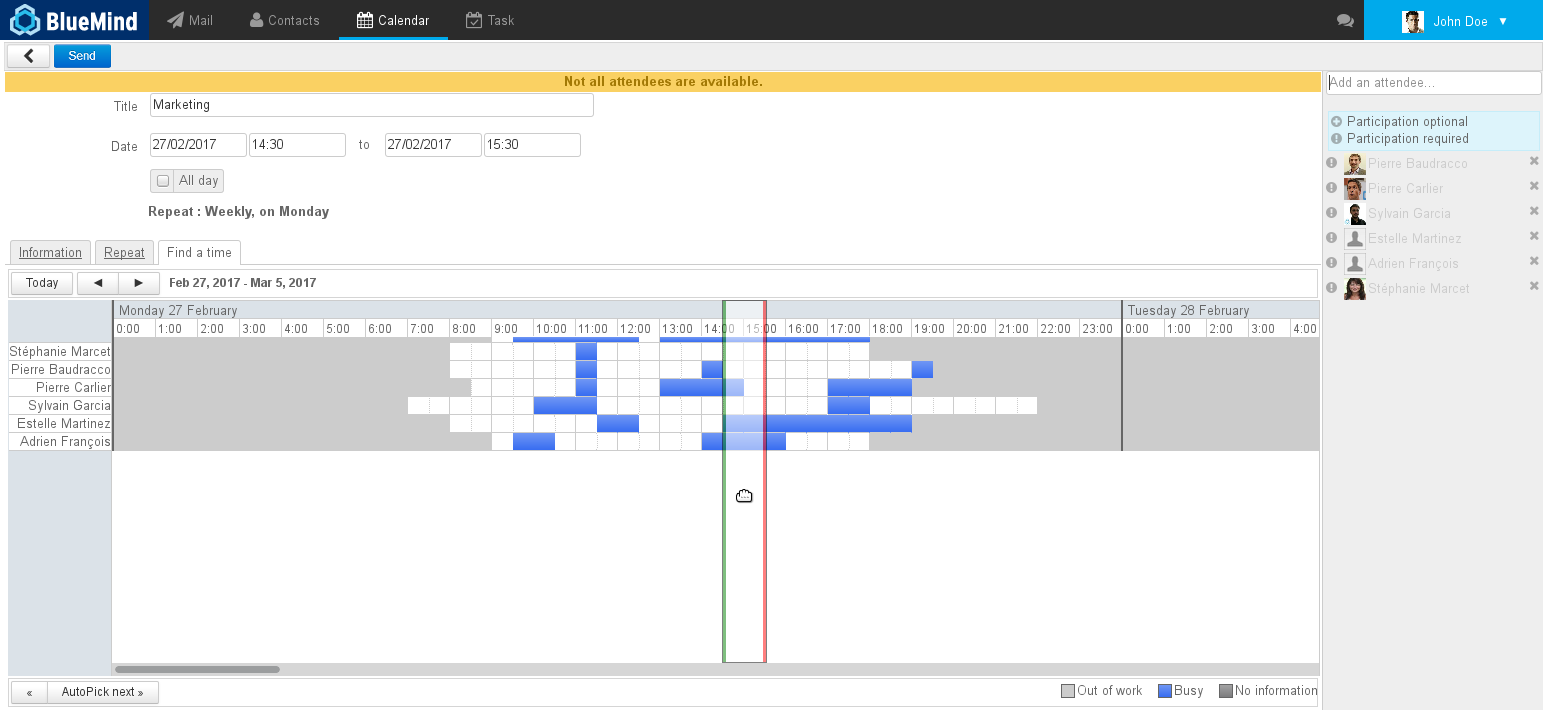
When the time slot overlaps with one or several users' event(s), a warning message appears at the top of the page:
| Ancre |
|---|
pjevents | pjevents | AttachmentsBlueMind Mail's linked attachments service allows you to attach files to calendar events – from version 3.5.13.
| Remarque |
|---|
|
To use this feature, you must have the following roles: - Linked attachments: used to attach files
- Drive: enables BlueMind storage space
If you can't see either of these sections, please ask your administrator. |
Once it is linked to an event, the file is available for download in the event details section at any time and it is sent in the invitation email to the event's participants if appropriate.
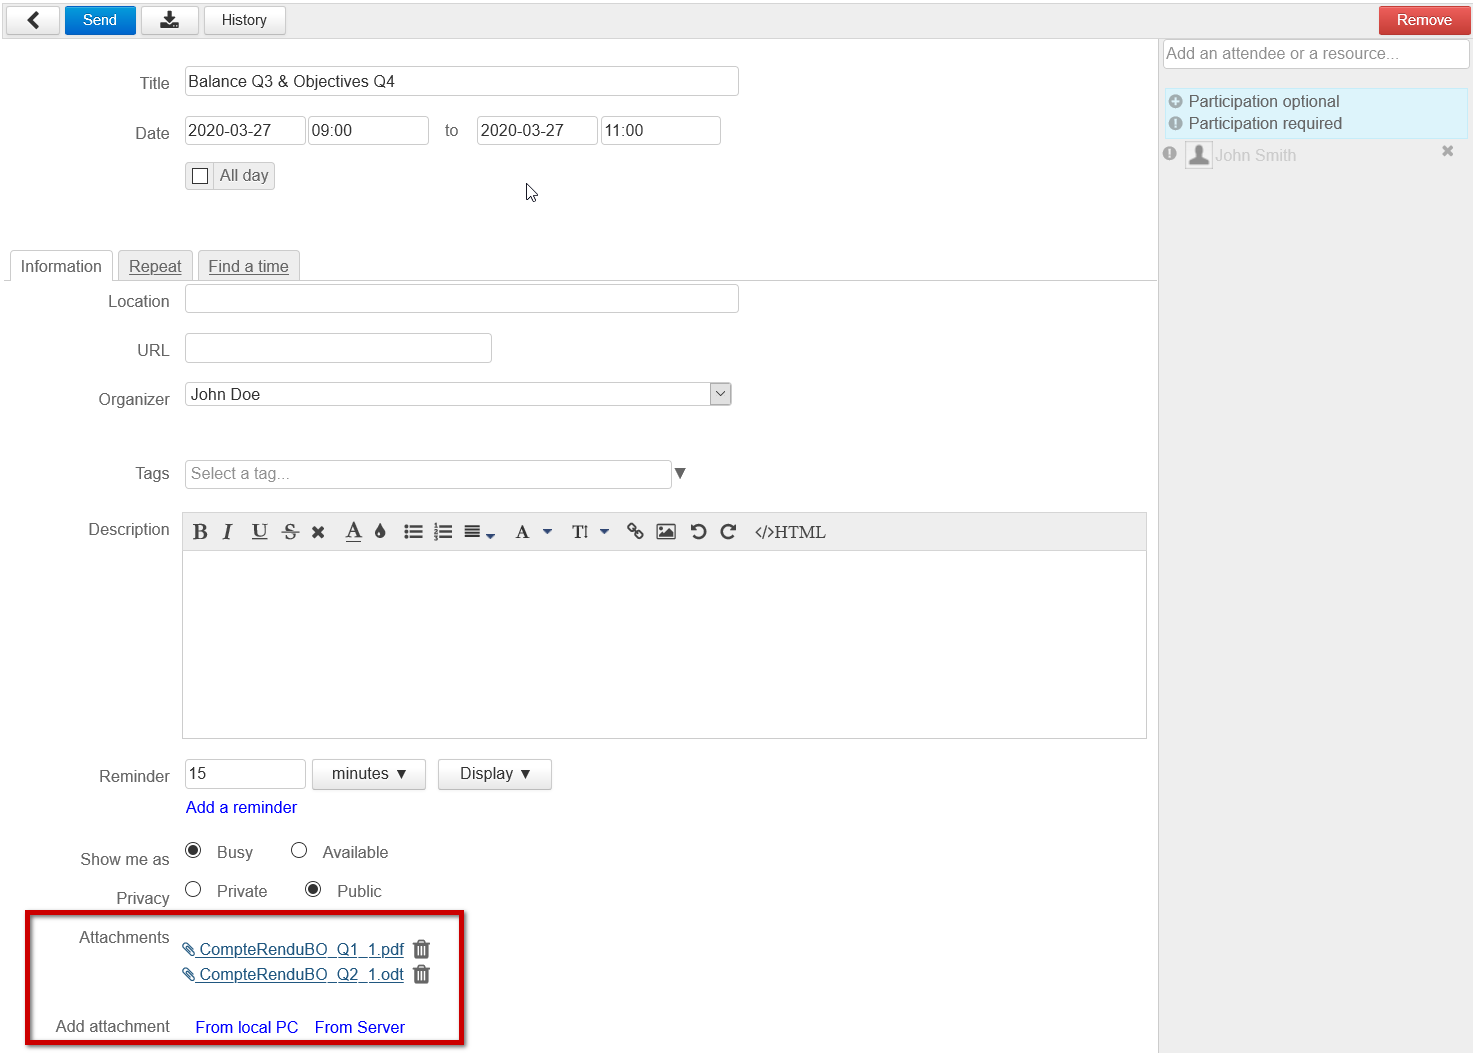 Image Removed
Adding/Deleting files
To add a file:
- click "From local PC" to upload a new file
If you have the appropriate role enabled – i.e. "Drive" – a second link is available:
- click "From server" to open the BlueMind file browser and attach a file already available in your storage space
Files can be found again using the file chooser and be attached to other calendar events or messages.
Click the trash  Image Removed icon next to the file's name to delete it.
Sending files to event participants
Files attached to an event are sent to its participants in the invitation email:
- as file attachments if the total message size is under the limit authorized by the server:
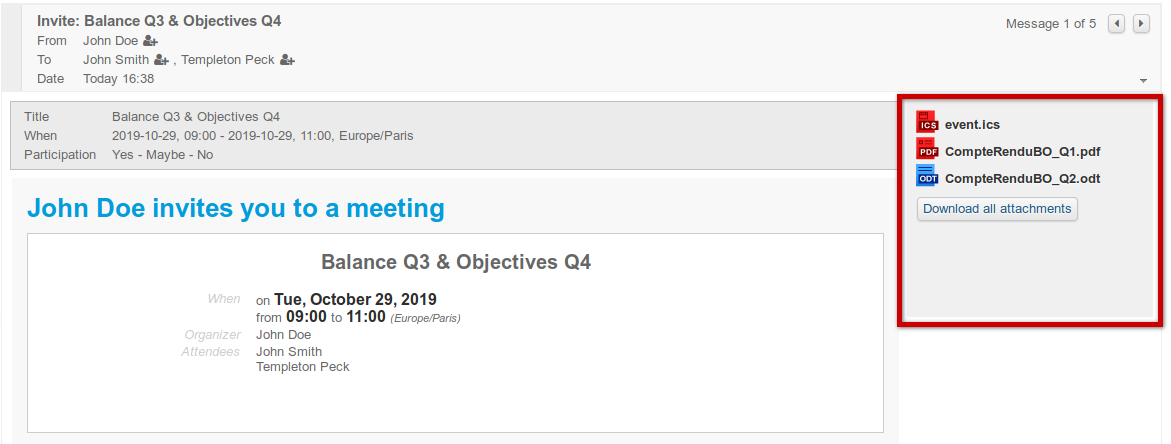 Image Removed
 - as download links if the total message size is above the limit authorized by the server:
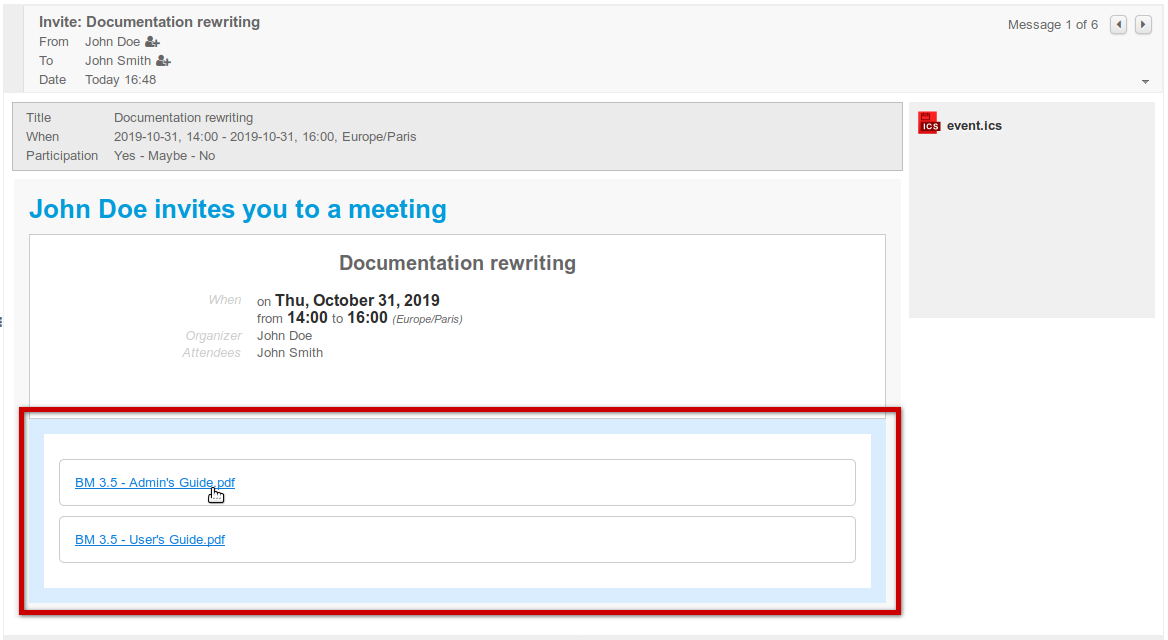 Image Removed
| Info |
|---|
File attachment/linking is completely automatic, it cannot be forced and applies to the combination of all attached files, even if some of them are small. |
Downloading a file
When an event has an attachment, a paperclip is shown in calendar view:
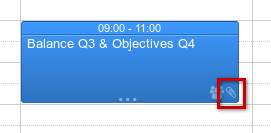 Image Removed
Files attached to an event can be downloaded at any time by opening the event's editing form:
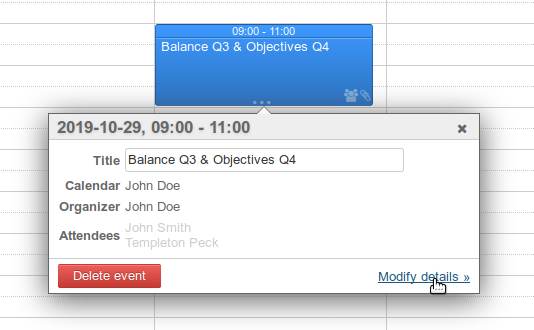 Image Removed
| Astuce |
|---|
| title | For event participants |
|---|
|
This also applies to event invitees: they can find the files and their download links in their calendar. Participants can also add files, however, just like for other changes they make to the event, they will not be shared with the organizer or other invitees. |
Modifying events
To modify an event:
- In the main window, click the event.
- Change the title and click save.
- Or, click the "Modify details" link. This opens the same window as for creating events (see above).
- Once changes are done, click "Save" at the top left of the page to apply.
| Astuce |
|---|
| title | Modifying Events and Notifications |
|---|
|
When they modify an event, organizers are given the option to send a notification if they edit one of the following fields:
- url
- title
- recurrence
- priority
- location
- description
- start date
- end date
- availability
- private/public
Adding participants does not trigger the notification Editing events
To edit an event:
- In the main window, click the event.
- Change the title and click save.
- Or, click the "Modify details" link. This opens the same window as for creating events (see above).
- Once changes are done, click "Save" at the top left of the page to apply
option – only the new attendee is sent an invitation notificationDeleting events
To delete an event:
- Click the event in the main window.
- In the dialog box that appears, click "Delete".
- if you are the event's organizer and you have invited several guests, the event is deleted in all the attendees' calendars and they receive an email notification.
- if you are a simple participant, only your attendance is deleted. The event remains in the other attendees' calendars.
The event organizer does not receive any email notification but you are marked as not attending in the event's guest list.
- If you delete a recurring event, you must choose to delete:
- this instance only,
- all past and future instances,
- future instances only.
| Remarque |
|---|
|
If you delete an event, it will no longer be shown in your calendar and you will no longer be able to change your attendance status. |
Attending events
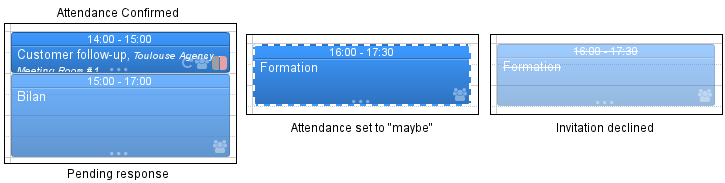
Display
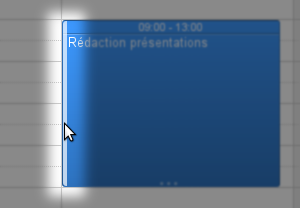
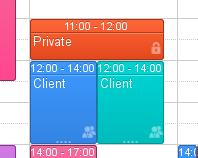
In Calendar, events are shown differently depending on the user's attendance participation status:
- Event accepted: solid color
- Event pending response: transparent color
- Participation deliberately set as "maybe": solid color with dotted frame
- Event rejected: transparent color, contents crossed out
| Bm_legend |
|---|
| bm_legend | Event display depending on user attendance status |
|---|
|
|
| Info |
|---|
You can choose not to display declined events. To do this, go to the settings manager > Calendar > General tab: "Show rejected events". |
Responding to event invitations
To accept or decline an invitation:
- Click the event in the main window.
- In the dialog box that opens, click the appropriate response button.
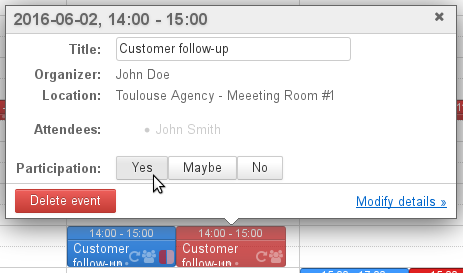
 Depending on your choice, a notification of your response will be sent to the event organizer.
 Image Removed For more information, please go to see L'agenda - §3 Modèle de gestion des réunions
Event history
Image Removed You can now view event creation and editing history.
In an event's detailed view, click "History":
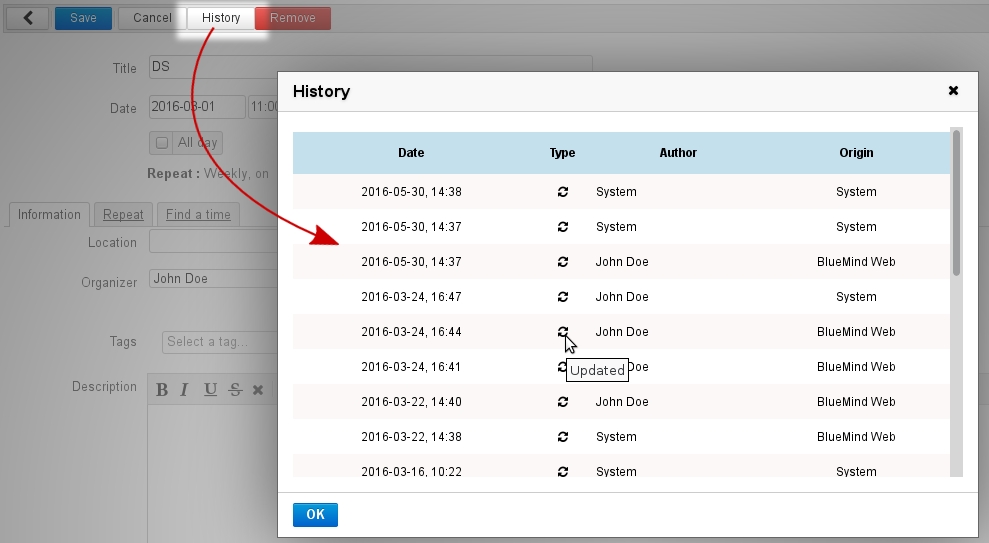
Event history shows:
- action date
- action type: "created" or "updated"
- author: who has performed the action
- origin: where the action has originated from – BlueMind web client, third-party client (thick or mobile), etc.